
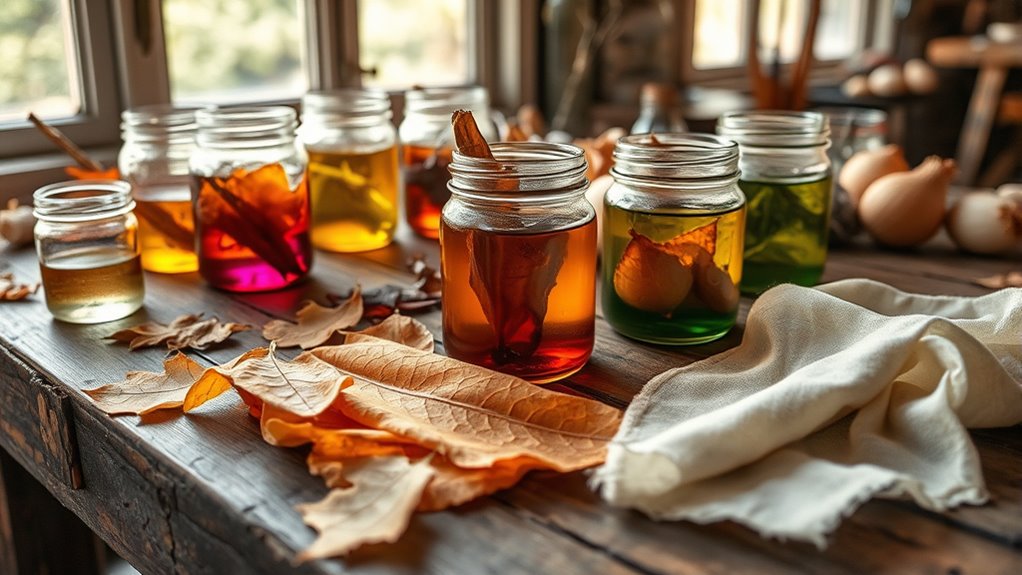
To make natural dyes using fallen leaves and onion skins, gather clean, pesticide-free materials and dry them thoroughly. Chop leaves or soak skins, then simmer in water to extract vibrant colors. Strain the dye, then soak your fabric in the liquid, stirring gently for even coverage. Fix the dye with mordants like alum or vinegar to enhance durability. Keep experimenting with combinations and techniques—more tips await if you continue exploring.
Key Takeaways
- Collect and dry fallen leaves and onion skins from pesticide-free areas for vibrant, chemical-free natural dyes.
- Simmer chopped leaves or onion skins in water to extract pigments, then strain to obtain dye liquids.
- Submerge fabrics in the dye bath for 30-60 minutes, adjusting time for desired color intensity.
- Use fixatives like alum, vinegar, or salt during or after dyeing to enhance color fixation and longevity.
- Rinse dyed fabrics in cool water, dry away from sunlight, and store properly to preserve vibrant, long-lasting colors.

Indigo Tie Fabric Dye Kit | Natural Shibori Powder Sachet | Permanent Easy Use Textile Paint | Dyeing Shirt Clothes Dress | Painting Party Supplies DIY Art Craft Set
- Natural, Chemical-Free Dye: Made from 100% natural sources, long-lasting brightness
- Versatile Fabric Compatibility: Suitable for cotton, linen, silk, canvas, and more
- Easy to Use: Includes clear instructions for simple dyeing
As an affiliate, we earn on qualifying purchases.
As an affiliate, we earn on qualifying purchases.
Gathering and Preparing Your Natural Dye Materials
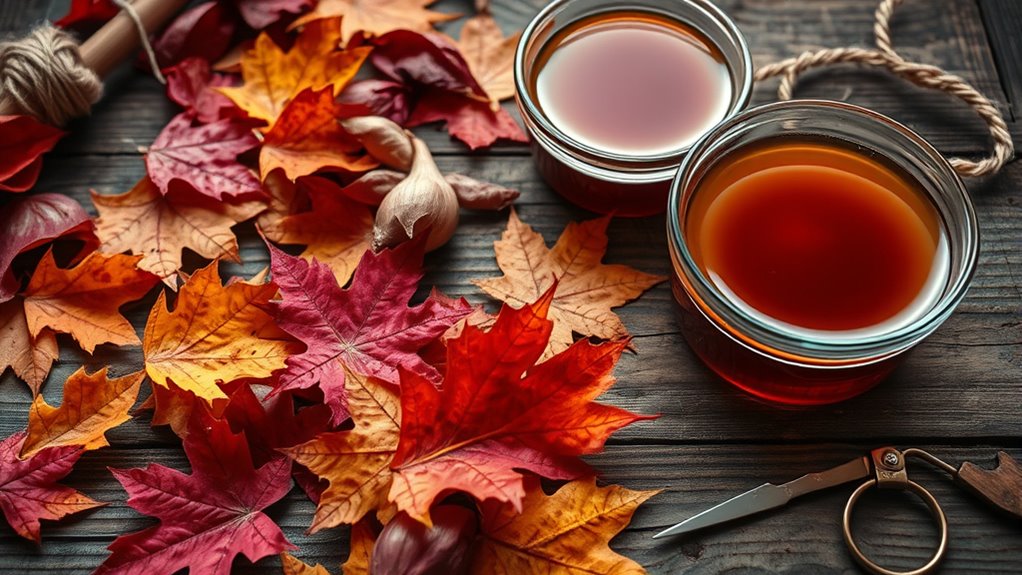
Before you begin dyeing, you need to gather and prepare your natural dye materials. First, collect fallen leaves and onion skins from safe, pesticide-free areas. Choose leaves with vibrant colors, such as oak or maple, and gather enough for your project. Rinse them gently to remove dirt and debris, then spread them out to dry completely. For onion skins, peel several onions and save the skins, which are rich in dye compounds. Dry all your materials in a well-ventilated space, away from direct sunlight, to preserve their color. Proper preparation guarantees you’ll get the best color and avoids contamination that could affect your dyeing results. Additionally, understanding the lifecycle of plants can help you select leaves and skins at their peak color for more vibrant dyes. Monitoring the plant growth cycle ensures you harvest materials when their dye content is most potent. Being aware of plant dye stability can also help you store your materials properly to maintain their dye potential over time. To maximize dye extraction, consider pre-soaking the materials, which can enhance the intensity of the colors produced. For best results, experimenting with different dyeing techniques can also improve your outcomes.
Extracting Color From Fallen Leaves
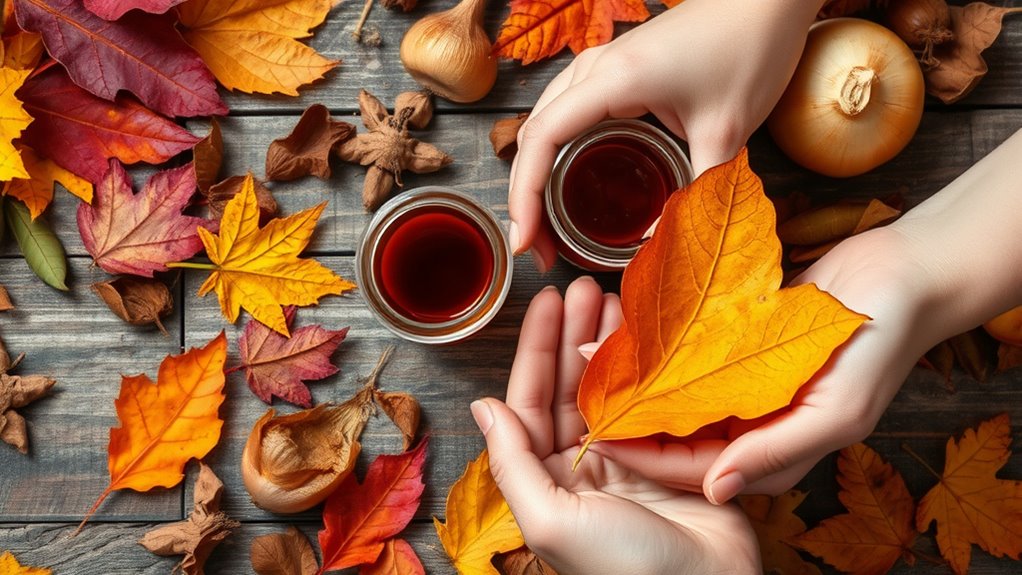
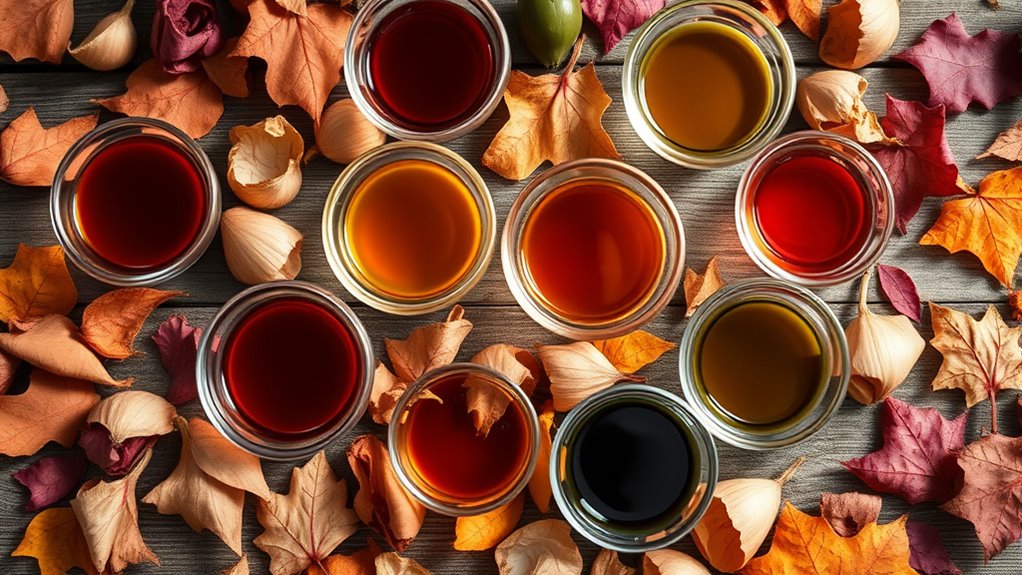
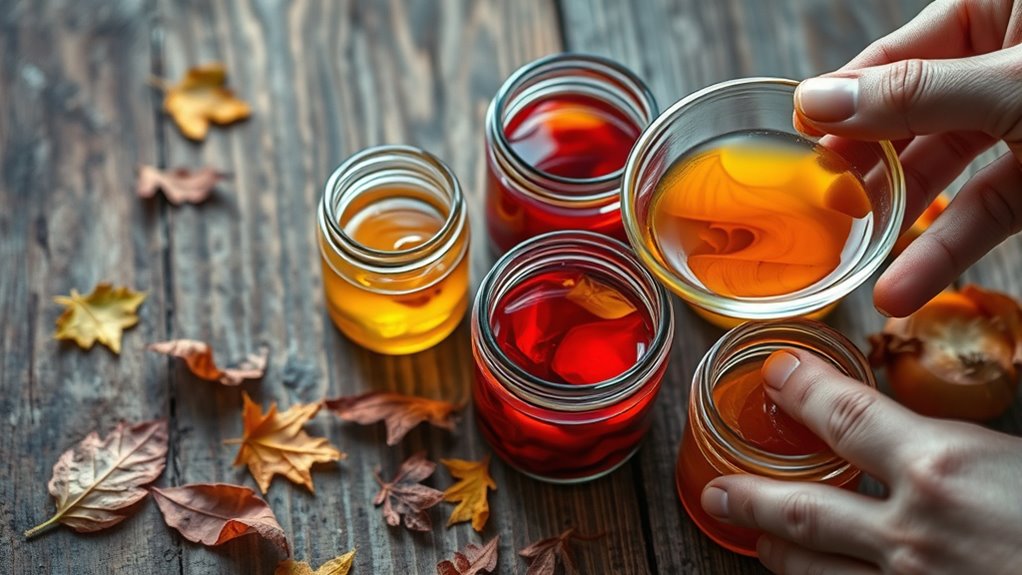
To extract color from fallen leaves, start by chopping them into small pieces to increase surface area and facilitate dye release. Place the chopped leaves into a large pot and cover them with enough water to submerge all the plant material. Bring the water to a gentle simmer, not a boil, to prevent damaging the pigments. Let the mixture simmer for about an hour, stirring occasionally. During this time, the leaves will release their colors into the water. After simmering, turn off the heat and allow the mixture to cool slightly. Strain out the leaves using a fine mesh strainer or cheesecloth, catching the liquid dye. This extracted liquid is now ready to be used for dyeing fabrics or fibers. Incorporating safety considerations such as proper handling of plant materials and ensuring non-toxic dyes is important for safe dyeing practices. Additionally, understanding the dye extraction process can help improve color yield and vibrancy. Proper testing small samples before full application can also minimize waste and ensure desired results. When working with natural dyes, it is also helpful to test small samples first to achieve the desired color intensity and prevent waste.
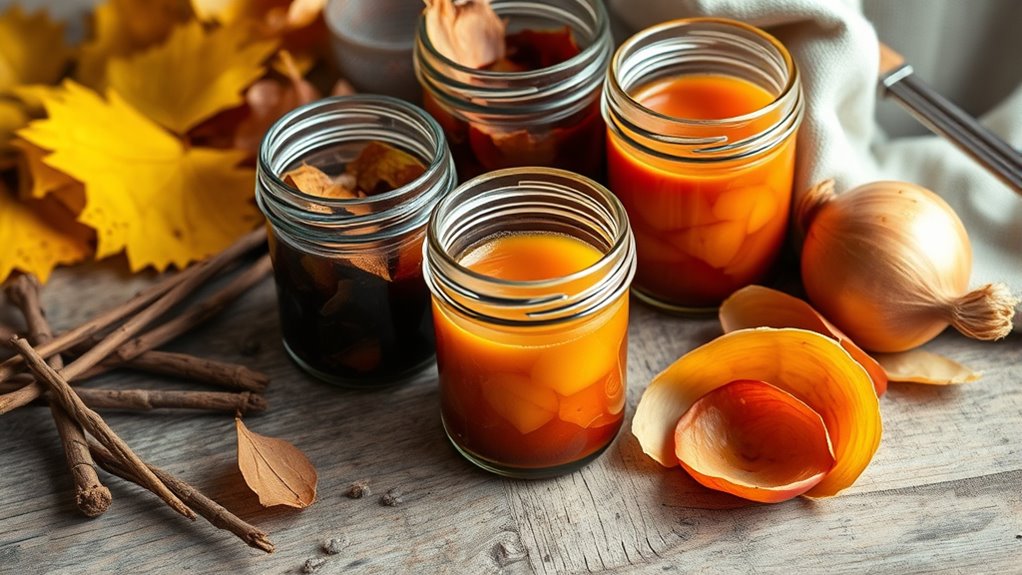
Creating Dye From Onion Skins

To create dye from onion skins, start by selecting clean, dry skins from yellow or red onions. Next, prepare a dye bath by simmering the skins in water until the color releases fully. Additionally, scenic views and charming local shops can enhance your vacation experience while you wait for the dye to set. Finally, apply the dye to your fabric and use fixatives to guarantee the color stays vibrant.
Selecting Onion Skins
Have you ever wondered how onion skins can produce rich, natural dyes? The key is selecting the right skins. Look for dry, papery skins that are free of mold or mold spots. Avoid skins with deep discoloration or blemishes, as they can affect dye quality. Fresh skins may not yield as vibrant a color as dried ones. Opt for skins from organic onions when possible, since pesticides can interfere with dyeing. The best skins come from onions with thick, tight layers. Use the table below to help you choose:
| Healthy Skin | Discolored or Moldy | Fresh or Dried | Organic or Conventional |
|---|---|---|---|
| Bright, dry, papery | Blemished, mold spots | Dried for better dye | Organic onions preferred |
Selecting quality skins guarantees vibrant, lasting dye results. Proper material selection is essential for achieving the best dyeing outcomes, especially considering the natural dye properties of onion skins. Being aware of fungal contamination can help in avoiding spoiled skins that may affect dye color and durability. Understanding dye extraction techniques can also improve the richness of the final color. Additionally, controlling the pH level of your dye bath can influence the resulting hue, ensuring more consistent and vibrant colors.
Preparing the Dye Bath
Once you’ve selected your onion skins, it’s time to prepare the dye bath. Start by placing the skins in a large saucepan. Then, follow these steps:
- Cover the skins with enough water to submerge them completely.
- Bring the mixture to a boil, then reduce the heat and let it simmer for about 30-45 minutes.
- Strain the liquid through a fine sieve or cheesecloth into another container, discarding the skins.
- For best results, consider testing the dye on a small fabric swatch to determine the final color and adjust the simmering time if needed. Remember, dye extraction can vary depending on the type of onion skins used.
This process extracts the natural pigments from the onion skins. The resulting dye bath will be rich in color and ready for your fabric or fiber. Keep in mind, the longer you simmer, the more intense the dye will be. Now, you’re all set for the next step!
Applying and Fixing Color
After preparing your dye bath, you can start applying the color to your fabric. Submerge it fully, guaranteeing even coverage. Gently stir to distribute the dye, and hold the fabric in the bath for 30-60 minutes, depending on the desired color intensity. To improve color fixation, rinse the fabric in cool water, then soak it in a mordant solution like alum or vinegar for better dye adherence. Monitoring keto diet macronutrient ratios can help you achieve the best results with your dyeing process.
Combining and Enhancing Your Dyes for Better Results
You can improve your natural dyes by mixing complementary colors to create richer shades. Using fixatives like salt or vinegar helps set the dyes and make the colors last longer. Experimenting with these techniques can lead to more vibrant and durable results. Incorporating color preservation techniques can further enhance the longevity of your dyes. Regularly monitoring air quality in your workspace can also help maintain optimal conditions for dyeing. Additionally, understanding AI-driven content analysis can assist in optimizing your dyeing process for better outcomes. Recognizing the financial impact of entertainment industries can inspire resourceful approaches to sustainable and cost-effective dyeing practices.
Mixing Complementary Colors
Mixing complementary colors can substantially enhance your natural dyes by creating richer, more vibrant hues. When you combine two opposing colors, such as blue and orange or red and green, you can produce complex shades that stand out. To get the best results, follow these steps:
- Choose the right pairings: Select complementary colors that complement the fabric’s base color.
- Start with small amounts: Mix tiny quantities first to test how the colors interact.
- Adjust gradually: Add more dye in small increments until you reach your desired shade.
This technique not only intensifies the color but also adds depth and dimension to your dyed project. Experimenting with complementary dyes allows you to discover a spectrum of unique, eye-catching hues from simple natural sources.
Using Fixatives Effectively
To achieve vibrant and long-lasting natural dyes, using fixatives effectively is essential. Fixatives help the dye bond with the fabric, enhancing color retention and brightness. Common fixatives include vinegar, salt, or alum. Add these during the dyeing process or as a post-treatment for better results. The right fixative depends on your dye and fabric type, so experiment to find what works best. Here’s a quick guide:
| Fixative | Best For | Application Method |
|---|---|---|
| Vinegar | Plant-based dyes | Soak fabric before dyeing |
| Salt | Wool and cotton | Add to dye bath |
| Alum | Protein fibers | Pre-treat fabric |
| Baking Soda | Brightening colors | Rinse after dyeing |
| Iron | Darkening shades | Use as mordant |
Applying Your Natural Dyes to Different Materials
Applying natural dyes to different materials requires understanding how each substrate interacts with the pigments. You’ll notice that some fabrics absorb dye more readily, while others may need pre-treatment. To get the best results, keep these tips in mind:
- Choose natural fibers like cotton, wool, or silk for vibrant, long-lasting color.
- Pre-soak materials in mordants such as alum or vinegar to improve dye uptake.
- Adjust dyeing time based on the material’s thickness and desired intensity.
Tips for Fixing and Preserving Your Dyes
Once you’ve achieved the desired color, fixing your natural dye is essential to guarantee it stays vibrant and doesn’t fade over time. To do this, soak your fabric in a mordant solution like alum or iron before dyeing, which helps the dye bond better. After dyeing, rinse your material in cold water to remove excess dye, then dry it away from direct sunlight to prevent fading. To preserve your dyed items longer, avoid washing them frequently or use a gentle, pH-neutral detergent. Adding a fixative like vinegar or salt during the washing process can also help lock in the color. Store your finished pieces in a cool, dark place to maintain their vibrancy. These tips ensure your natural dyes stay bright and beautiful for years.
Frequently Asked Questions
How Long Do Natural Dyes Typically Last on Fabrics?
Natural dyes typically last on fabrics between 4 to 6 washes, but this can vary based on the dye type and fabric. You should expect some fading over time, especially with frequent laundering or exposure to sunlight. To prolong your dye’s vibrancy, wash your fabrics in cold water, avoid harsh detergents, and consider setting the dye with a mordant. Proper care helps maintain the colors longer.
Can I Reuse Leftover Dye Solutions Safely?
Wondering whether you can reuse your leftover dye solutions safely? Absolutely! If the dye remains vibrant and free from mold or foul smell, you can store it in a sealed container for future use. Just strain out any sediment and keep it in a cool, dark place. When you’re ready to dye again, give it a gentle stir, and you’re good to go. Recycling dye saves resources and extends your creative capacity!
Are There Any Safety Precautions When Handling Onion Skins?
When handling onion skins, you should take safety precautions to protect yourself. Wear gloves to avoid staining your skin and prevent irritation, especially if you have sensitive skin. Work in a well-ventilated area to avoid inhaling any fumes or dust. Avoid contact with your eyes, and wash your hands thoroughly after handling the skins. These simple steps keep you safe while enjoying your natural dyeing projects.
How Do Environmental Conditions Affect Dye Results?
Environmental conditions greatly influence dye results. You should consider temperature, humidity, and sunlight during the dyeing process. Warm, stable temperatures help colors develop fully, while high humidity can cause uneven dye absorption. Sunlight can fade colors if exposed too long. To get consistent, vibrant results, you need to control these factors, dye in a shaded, cool area, and avoid excessive moisture or direct sunlight during and after dyeing.
Can Natural Dyes Be Used on Synthetic Fabrics?
You might think natural dyes only work on natural fabrics, but they can also be used on synthetic ones with some prep. While synthetic fibers don’t absorb dyes as easily, you can improve results by pre-treating the fabric with a mordant or using heat and vinegar solutions. Don’t worry—experimenting with different methods can yield surprisingly vibrant colors, making your DIY project both eco-friendly and creative on any fabric type.
Conclusion
By exploring natural dyes with fallen leaves and onion skins, you connect with centuries-old traditions and help reduce chemical waste. Did you know that using plant-based dyes can lower your water pollution by up to 80% compared to synthetic dyes? Embrace these eco-friendly methods to create vibrant, unique fabrics while making a positive impact on the environment. Start your DIY dye journey today—beautiful, sustainable, and full of possibility!