
To revamp your floors with a boho touch, start by choosing vibrant, earthy, or contrasting colors with geometric or floral patterns that match your style. Use high-quality stencils and prepare your surface with cleaning and sanding. Apply paint with a sponge roller or brush for crisp outlines and layer your colors carefully. For an even finish, follow detailed application tips, and explore various pattern options. Keep exploring to discover more ways to create stunning, personalized floors.
Key Takeaways
- Choose bold, geometric, or floral stencil patterns that reflect boho style for a lively floor transformation.
- Use high-quality acrylic or latex paints in earthy and vibrant colors to create eye-catching tiled effects.
- Prepare surfaces thoroughly by cleaning, sanding, and priming for smooth, durable stencil application.
- Secure stencils with painter’s tape or spray adhesive; apply paint with foam rollers or stippling brushes for crisp lines.
- Finish with a protective water-based polyurethane to enhance durability and maintain the painted design.
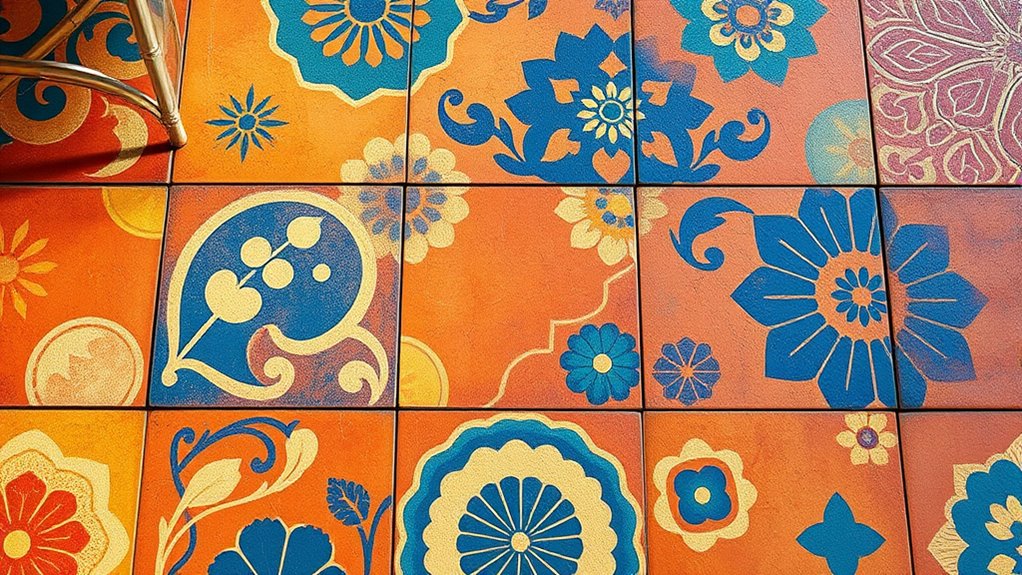
Choosing the Perfect Boho Floor Stencil Designs
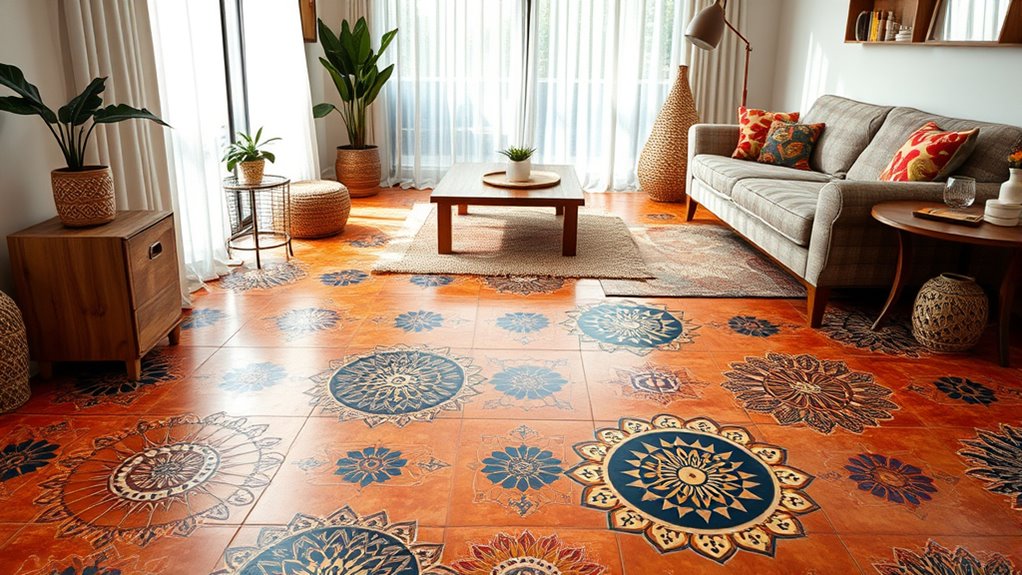
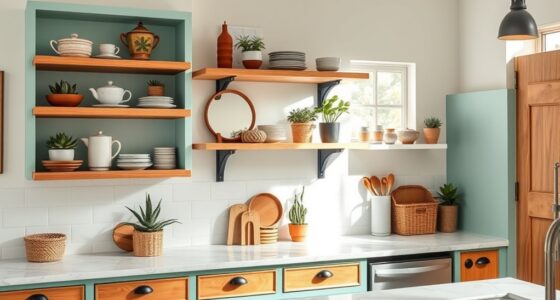
When choosing the perfect boho floor stencil design, it’s important to contemplate how the pattern complements your existing decor. A boho stencil can introduce eclectic charm with tribal motifs, floral designs, or geometric shapes that evoke a free-spirited vibe. Floor tile stencils come in various sizes, from 6×6 inches to 16×16 inches, so select one that fits your space and desired level of detail. Many stencil designs are crafted from durable, reusable mylar, allowing you to enjoy multiple projects with consistent results. Color choices are highly customizable; you can incorporate metallics, bold hues, or neutral tones to match your style. Carefully consider your decor style, color palette, and pattern complexity to select a stencil design that creates a cohesive, stylish floor transformation. Additionally, creating a farmhouse bedroom with warm colors and vintage accents can complement a boho aesthetic, adding to the layered, eclectic feel of your space. Exploring color coordination techniques can help you achieve a balanced and harmonious look. Incorporating creative practice techniques, such as experimenting with different color combinations or stencil patterns, can help you achieve a unique and personalized look. To ensure a professional finish, it’s also helpful to prepare your surface properly before applying the stencil.
Materials and Tools Needed for Painting Floors
To achieve a professional-looking painted floor, choosing the right materials and tools is essential. Start with high-quality, water-based acrylic or latex paint designed for floors; this ensures durability and easy clean-up. Select stencils that match your desired boho pattern, and gather appropriate tools such as stencil brushes, dense foam rollers, or spray tools for precise application. Before painting, prepare your surface by cleaning thoroughly, sanding if needed, and applying a primer to promote paint adhesion and prevent chipping. Use spray adhesive or painter’s tape to secure your stencils, helping to minimize seepage and achieve clean lines. Incorporating a high contrast ratio in your design can also enhance the visual impact of your painted tiles. To ensure a smooth finish, consider using a professional-grade sprayer for even application, especially on larger surfaces. Additionally, selecting a durable paint finish can help your design withstand foot traffic and wear over time. It’s also beneficial to choose paints with low VOC emissions for healthier indoor air quality. Finish your project by applying a clear water-based polyurethane sealer, which protects your design and prolongs its lifespan.
Preparing Your Surface for Stenciling Success
Before you start applying paint and stencils, it’s important to prepare the surface thoroughly. Proper cleaning and prep are essential for a smooth, lasting finish. Begin by removing dirt, grease, and dust to ensure good paint adhesion. Fix any cracks, holes, or imperfections with filler, then sand them smooth. If the surface has a glossy finish or sealers, use a degreaser or sandpaper to remove these layers. Mask off edges, trims, and surrounding areas with painter’s tape for sharp lines. If the surface is porous or previously painted, applying a bonding primer will improve paint grip and durability. Additionally, understanding Halloween traditions around the world can inspire creative themes and designs for your painted tiles or stenciled patterns. Knowing the support hours for different entertainment venues can help you plan your project timeline to avoid busy periods and ensure access to necessary supplies.
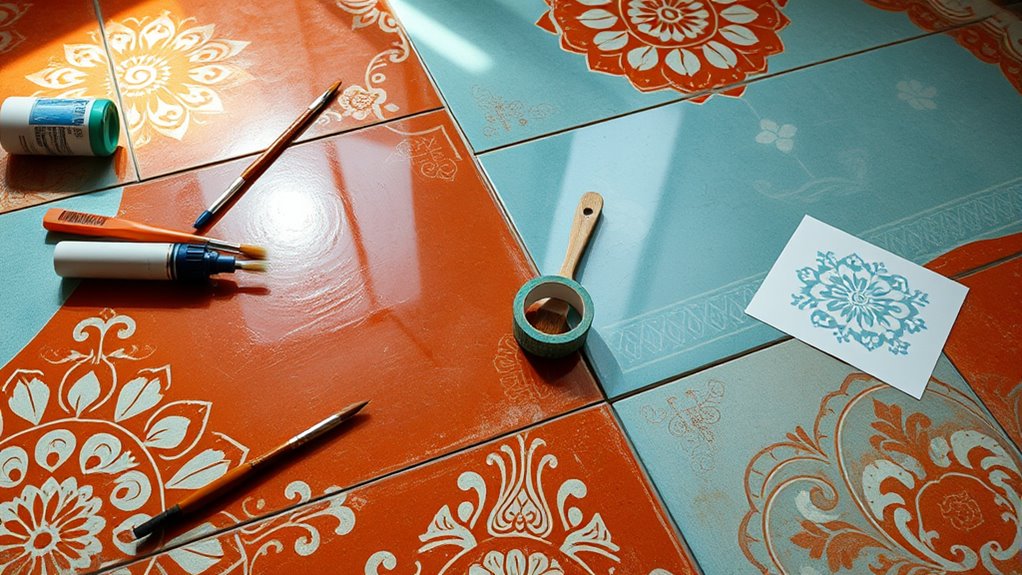
Tips for Achieving Precise and Clean Stencil Application
Achieving a precise and clean stencil application starts with ensuring the surface is thoroughly prepared and free of dust or debris. A clean surface prevents paint seepage and helps you achieve sharp, crisp edges. Secure your stencil using painter’s tape or repositionable spray adhesive to keep it steady during painting, reducing any unwanted movement. When applying paint, use a dense, flat brush or foam roller, and dab or stipple to avoid bleeding under the stencil. To keep lines crisp, use minimal paint on your brush or roller and opt for multiple light coats rather than one heavy layer. Additionally, understanding self watering plant pots principles can help you plan your project layout more effectively, ensuring a clean and clutter-free workspace throughout the process. Proper paint selection also plays a crucial role in achieving a flawless finish, as some paints are better suited for stenciling on tiles or painted surfaces. Choosing the right painting tools and techniques can further enhance your results and make your project more manageable. Incorporating creative design ideas can help you personalize your pattern and make your project truly unique, all while maintaining a neat and professional appearance. These tips help you achieve a flawless, professional-looking painted tile or pattern.
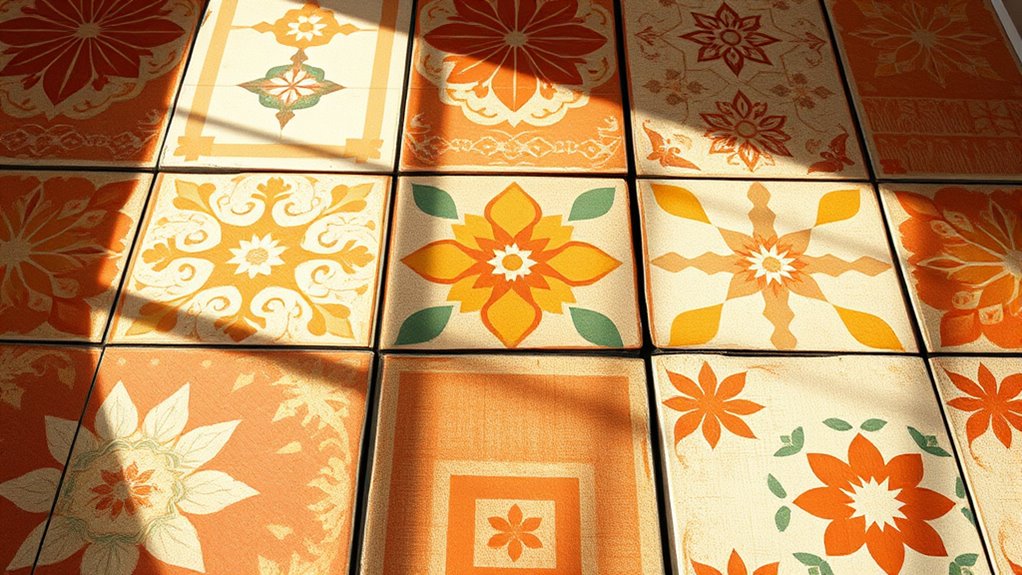
Creative Color Combinations to Enhance Your Boho Look
To elevate your boho floors, consider bold contrast pairings like navy blue and warm coral to create a lively, eclectic vibe. Earthy tones such as terracotta, ochre, and deep teal, combined with metallic accents, add warmth and sophistication. Mixing vibrant and natural hues in your stencil designs can truly capture the free-spirited essence of boho style. Incorporating meaningful home decor elements can further enhance the authentic boho aesthetic. Additionally, selecting interior design techniques that emphasize layering textures and colors can make your space feel more inviting and personalized. Exploring hackathon opportunities related to interior design innovations can inspire fresh ideas and creative solutions for your decorating projects. Being aware of retail hours can also help you plan visits to stores offering unique decor pieces to complete your boho look. Considering the nutritional value of juices, such as using vibrant juice-inspired color palettes, can add a fresh and lively touch to your decor theme.
Bold Contrast Pairings
Bold contrast pairings are a powerful way to make boho stencil patterns pop and create visual impact. By choosing high-contrast paint colors, you can highlight intricate stencil designs and add drama to your floors. Classic combinations like navy blue and white or black and gold instantly draw the eye and emphasize pattern details. You can also mix earthy tones with vibrant accents to enhance the layered, eclectic feel of boho decor. To create depth and texture, consider pairing matte finishes with glossy or metallic paints in contrasting hues. These bold contrast pairings transform your space into a lively, artistic statement. Additionally, incorporating durable paint finishes ensures your floors maintain their vibrant contrast over time. Incorporating creative color combinations can further elevate your design and reflect your personal style. When selecting colors, consider color theory principles to achieve a harmonious yet striking look that complements your overall decor.
Earthy and Vibrant Hues
Earthy and vibrant hues work together to create a dynamic boho floor that feels both grounded and lively. By mixing earth tones like terracotta, olive green, and warm beige with vibrant colors such as coral, turquoise, and mustard yellow, you add energy and depth to your space. Incorporate color blocking techniques with contrasting shades like deep burgundy and soft blush to highlight bold geometric or floral patterns. Combining muted neutrals with metallic gold or bronze paints adds a sophisticated, eclectic touch. Use organic, pigment-rich hues that mimic natural elements, amplifying the earthy and vibrant vibe. Understanding color theory can help you create harmonious combinations and striking contrasts for your design. Being mindful of paint application techniques ensures a polished, professional look that enhances your pattern work. Additionally, selecting quality paints can significantly impact the durability and finish of your design. To achieve a truly cohesive look, consider how color psychology influences the mood of your space and enhances your overall aesthetic. Here’s a visual guide:
| Earth Tones | Vibrant Colors |
|---|---|
| Terracotta | Coral |
| Olive Green | Turquoise |
| Warm Beige | Mustard Yellow |
| Deep Burgundy | Soft Blush |
Step-by-Step Guide to Painting and Stenciling Your Floor

To get started, you need to prepare your surface by cleaning and lightly sanding it for better paint adhesion. Next, choose the right paints and materials that work well on your floor’s surface. Finally, carefully apply your stencil and follow the steps to create clean, crisp patterns that last.
Prepare Surface Properly
Before you start painting or stenciling, it is vital to prepare the surface thoroughly. Proper floor preparation guarantees excellent paint adhesion and a smooth finish. First, clean the entire surface to remove dirt, grease, and debris. Next, repair any cracks or imperfections with filler or patching compound, allowing it to dry completely. Use painter’s tape to mask off edges, baseboards, and surrounding areas for clean lines. Applying a high-quality primer suitable for your floor type (concrete, tile, or wood) is necessary to improve durability and paint adhesion. Make sure the primer dries fully according to the manufacturer’s instructions before moving on to painting or stenciling. Proper preparation creates a solid foundation for your design and guarantees long-lasting results.
Choose Suitable Paints
Choosing the right paints is essential for a durable and professional-looking floor finish. For DIY floor painting, select high-quality, water-based, low-VOC paints designed specifically for surfaces like concrete, wood, or tile. Proper paint selection guarantees your painted tiles resist wear and tear over time. Use a primer suited for your floor material to promote adhesion and prevent staining or peeling. Follow the manufacturer’s instructions for mixing, application, and drying times to achieve a smooth, even surface. To visualize, imagine these options:
| Surface Type | Recommended Paint Type | Key Benefits |
|---|---|---|
| Floor tiles | Water-based acrylic | Easy cleanup, durability |
| Concrete | Epoxy or specialized floor paint | Resistance to moisture |
| Wooden floors | Latex or oil-based | Flexibility, protection |
Adding stencil adhesive and sealing with polyurethane will extend your design’s lifespan and keep your floor looking fresh.
Apply Stenciled Patterns
Once your floor is clean and primed, you can start applying your stenciled pattern. Position your stencils carefully, using painter’s tape or repositionable spray adhesive to secure them firmly. This prevents shifting and ensures crisp lines for your painted tiles. Use stencil brushes or dense foam rollers to apply paint in thin, even layers, working from the center outward to avoid seepage. For multi-color designs, let each color dry completely before repositioning the stencil and adding another shade, preventing bleeding. Focus on achieving a clean, consistent floor design by maintaining steady hand movements. Remember, proper application of stencils is key to a professional-looking finish and a stunning boho-inspired floor. Finish with a water-based polyurethane to protect your pattern and boost durability.
Maintaining and Caring for Your Painted and Stenciled Floors

To keep your painted and stenciled floors looking their best, regular cleaning is essential. Sweep or vacuum often to remove dirt and debris that can scratch the surface and damage your painted floors. Use a damp mop with a gentle, water-based cleaner or mild soap to clean without harming the paint or stenciled patterns. Avoid harsh chemicals, abrasive scrubbers, or steam cleaners, as these can strip paint or cause stencil edges to peel. To protect your design, apply a clear water-based polyurethane sealant after painting, and reapply as needed based on foot traffic. Promptly clean spills or stains with a soft cloth and mild cleaner to prevent staining and preserve the longevity of your painted floors. Proper care keeps your boho-inspired floors vibrant and beautiful.
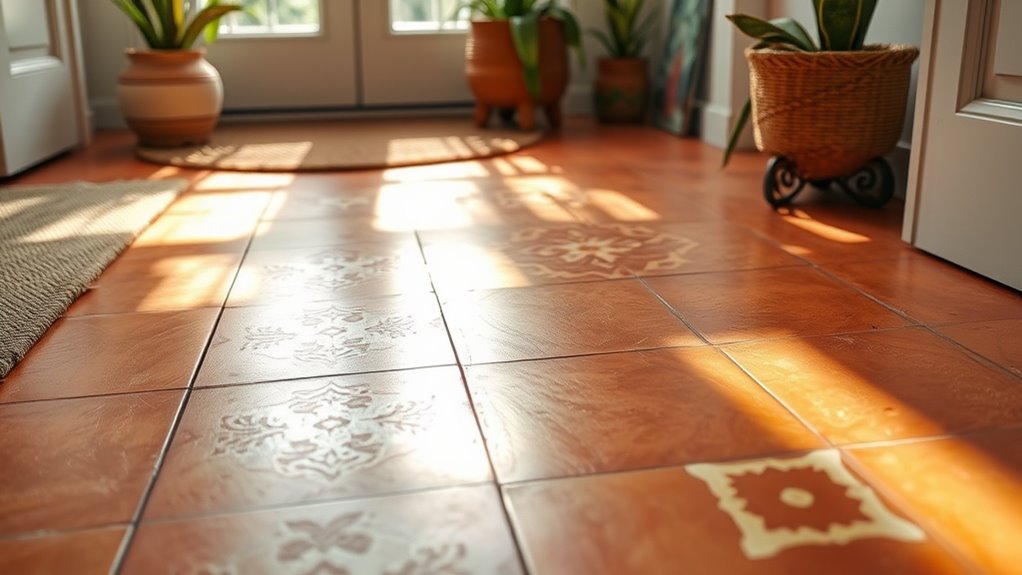
Inspiring Before and After Transformations

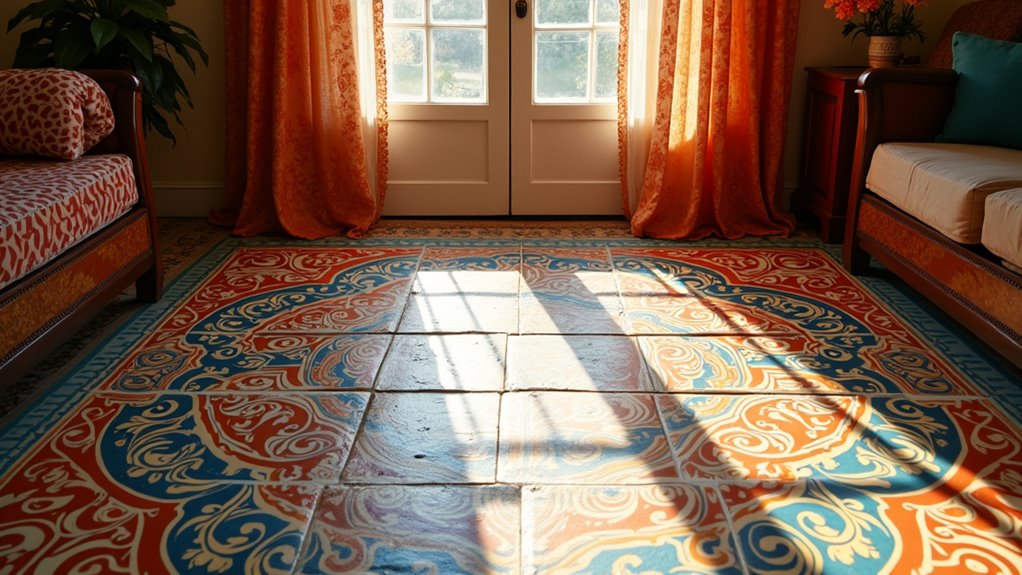
Transforming your floors can produce stunning results that dramatically enhance any space. Before and after photos reveal how plain concrete or outdated tiles become vibrant, boho-inspired areas with the help of stencils. Large, intricate designs like Moroccan or floral patterns can create a high-end look without breaking the bank, especially in DIY projects. Achieving a striking transformation involves choosing the right color schemes and layering stencils for depth and interest. Applying a sealant afterward guarantees durability and keeps your design looking fresh over time. Visual evidence shows how painted and stenciled floors can redefine patios, bathrooms, or entryways. Consider these ideas:
Transform your space with vibrant, stenciled floors for a stunning, high-end look DIY style
- Using stencils for bold, detailed patterns
- Incorporating Tile Allover for a seamless look
- Combining multiple stencil layers for dimension
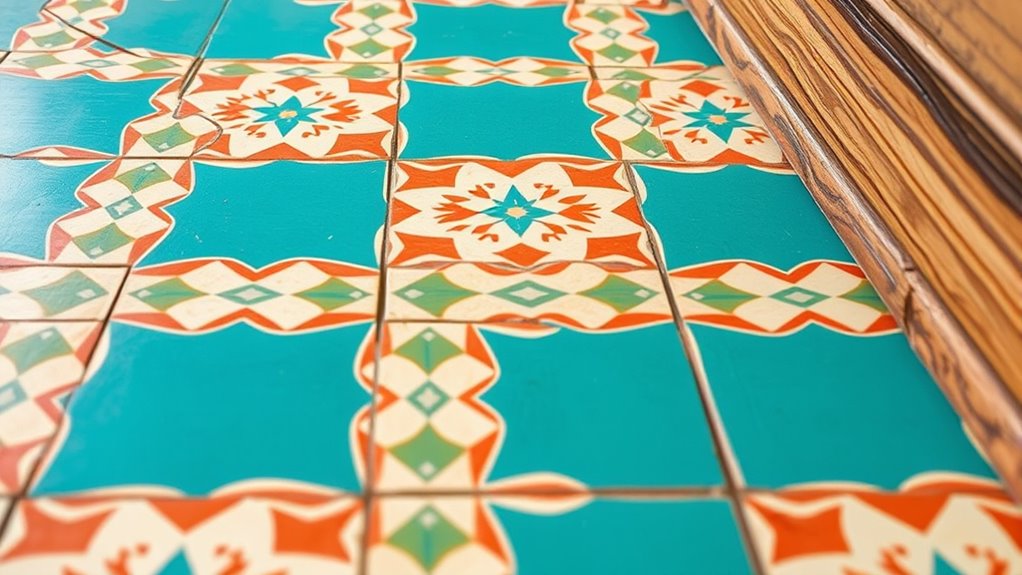
Exploring Various Patterns: From Geometric to Floral

Have you ever considered how different pattern styles can dramatically change your floor’s appearance? Geometric patterns like herringbone, chevron, and Moroccan tiles create a sleek, modern look with stencil designs that add structure and visual interest. Floral motifs, such as damask or botanical prints, introduce a soft, organic vibe perfect for boho spaces, featuring intricate and repeating designs. Repeating tile-inspired patterns like star, medallion, or encaustic designs can be customized in size and color for a personalized touch. You can also mix abstract and freeform patterns, like watercolor or asymmetrical floral arrangements, for a more eclectic style. Here’s a quick overview:
| Pattern Type | Style Examples | Effect |
|---|---|---|
| Geometric patterns | Herringbone, chevron | Modern, structured |
| Floral motifs | Damask, botanical | Soft, organic, boho vibe |
| Repeating designs | Star, medallion | Personalized, layered look |
Troubleshooting Common Challenges in Floor Stenciling
If you notice paint bleeding or uneven pattern alignment, don’t worry—these are common issues that can be fixed. Make sure your surface is clean and well-primed, and use the right adhesive to keep your stencil steady. Practice on a scrap piece first to identify and correct problems before working on your main floor.
Paint Bleeding Issues
Ever noticed paint seeping under your stencil edges, creating blurry lines? This is a common paint bleeding issue. To combat it, make sure your stencil is securely sealed using stencil seals or repositionable tack spray, preventing excess paint from seeping underneath. When applying paint, use dense foam rollers or stencil brushes to control paint application better and reduce bleed-through. Also, apply a thin, even layer of paint and wait for it to dry slightly before adding a second coat—this minimizes seepage and sharpens edges. Choosing high-quality, low-odor latex or acrylic paints with good adhesion helps achieve crisp lines. Remember, proper preparation and careful paint application are key to preventing paint bleeding and maintaining clean, defined stencil edges.
Uneven Pattern Alignment
Uneven pattern alignment is a common challenge when floor stenciling, but it can be effectively addressed with careful preparation. Start by marking key reference points to ensure proper stencil alignment, which helps maintain pattern consistency. Using a repositionable spray adhesive keeps the stencil secure, preventing shifting during multiple passes and reducing misalignment. Measure and scale your stencil to fit your floor’s dimensions, ensuring the pattern lines up seamlessly across large areas. Overlap stencil edges slightly and carefully blend paint layers to fix small misalignments, creating a cohesive look. Regularly check your progress to catch any pattern inconsistencies early. This proactive approach helps you achieve a professional, uniform finish with smooth paint blending and consistent stencil alignment throughout your project.
Frequently Asked Questions
Do Stenciled Floors Last?
You might wonder if stenciled floors last. With proper sealing using water-based polyurethane and high-quality paint, your design can stay vibrant for several years. Regular cleaning with gentle solutions and avoiding harsh tools help maintain it. Applying a clear topcoat adds extra protection. Keep in mind, foot traffic affects longevity—indoor residential floors typically need touch-ups every 3 to 5 years, but with care, your pattern can last longer.
What Paint to Use to Stencil Tile Floor?
Did you know that using the right paint can extend your tile floor’s lifespan by up to 50%? For stenciling, you should use water-based acrylic or latex floor paints—they’re durable and easy to clean. Choose paints made for high-traffic areas, apply a tile primer first, and finish with a clear topcoat for protection. This guarantees your design stays vibrant and intact through daily wear.
How Do You Seal a Stenciled Floor?
To seal a stenciled floor, wait 24-48 hours for the paint to cure. Use a water-based, clear polyurethane sealant suitable for floors. Apply it with a clean brush or roller in thin, even coats, and let each coat dry completely before adding the next. Usually, 2-3 coats do the trick. Avoid oil-based products, as they can yellow or damage your design over time.
Do Tile Stencils Work?
Yes, tile stencils work when you use proper techniques and quality paints. They allow you to create detailed, professional-looking patterns that mimic real tiles, often at a lower cost. Reusable and made from durable mylar, these stencils are versatile for various surfaces like concrete, ceramic, and wood. Just verify you prepare your surface well and seal your work afterward for long-lasting, clean lines.
Conclusion
Did you know that painted and stenciled floors aren’t just trendy—they can actually boost your home’s value? With the right tools, patience, and a bit of creativity, you can transform your space into a boho paradise. So, why not give it a try? Your floors might just be the secret to a stunning, personalized home that’s both stylish and unique. Embrace the process—you might be surprised at how much a little paint can do!