
To install a rustic outdoor shower with upcycled fixtures, start by choosing a level, well-drained spot and prepare the foundation with gravel or concrete for stability. Gather reclaimed fixtures and materials from salvage yards or online sources, ensuring they’re durable and weather-resistant. Design a layout that maximizes privacy and natural aesthetics, then connect your plumbing carefully, sealing all connections. Finish with landscaping and safety features—if you want detailed steps, keep exploring to learn more.
Key Takeaways
- Select a level, well-drained site and plan the layout to maximize privacy, accessibility, and natural aesthetics.
- Source durable, weather-resistant reclaimed fixtures from salvage yards or online marketplaces.
- Prepare a solid, even foundation using gravel, crushed stone, or concrete for stability and proper drainage.
- Connect reclaimed plumbing fixtures securely with compatible fittings, sealant, and precise measurements to prevent leaks.
- Incorporate safety features like non-slip surfaces, regular maintenance, and natural elements to ensure durability and aesthetic appeal.
Planning Your Rustic Outdoor Shower Space
Before you begin building your rustic outdoor shower, it’s essential to plan the space carefully. Consider how much room you need for comfort and movement, ensuring enough clearance for access and privacy. Identify a flat, well-drained area that won’t flood or pool water, and think about sunlight exposure—shade can keep the shower area cooler. Decide on the proximity to existing water sources and how you’ll conceal plumbing and fixtures for a natural look. Think about the surrounding environment—use natural barriers like plants or rocks for privacy and aesthetics. Sketch a simple layout to visualize placement, making sure there’s enough space for a small changing area if needed. Proper planning helps you create a functional, inviting rustic outdoor shower that complements your landscape. Incorporating durable and eco-friendly fixtures can also enhance the overall sustainability of your outdoor space considering high-quality materials.
Gathering and Selecting Upcycled Materials
Start by exploring local salvage yards or online marketplaces to find unique fixtures that match your rustic style. When selecting materials, prioritize durability to make sure your shower withstands outdoor conditions over time. By carefully choosing both distinctive pieces and sturdy supplies, you’ll create a charming and lasting outdoor shower. Incorporating environmentally friendly options can also contribute to sustainability in your project and may provide additional beneficial ingredients like collagen or hyaluronic acid to enhance the overall quality. Additionally, selecting weather-resistant materials ensures your fixtures remain functional and attractive despite exposure to the elements. Utilizing email marketing tools can help you promote your project efficiently and reach a broader audience interested in sustainable DIY projects.
Sourcing Unique Fixtures
Where can you find distinctive fixtures that give your outdoor shower a truly rustic charm? Look beyond retail stores—thrift shops, salvage yards, and online marketplaces are goldmines for upcycled treasures. To help you get started, here’s a quick guide:
| Source | Item Examples | Tips |
|---|---|---|
| Thrift Stores | Antique showerheads, handles | Inspect for rust and leaks |
| Salvage Yards | Reclaimed metal pipes, fixtures | Confirm material integrity |
| Online Marketplaces | Upcycled faucets, vintage valves | Read seller reviews |
| Flea Markets | Unique hardware, vintage taps | Negotiate for better deals |
| Community Swaps | Local exchanges for fixtures | Bring measurements and photos |
This approach guarantees your outdoor shower exudes rustic charm with truly unique fixtures, especially when you explore upcycled materials that can be repurposed creatively. Incorporating sustainable sourcing practices can also enhance the eco-friendliness of your project. Additionally, understanding vintage fixtures can help you select authentic items that add character to your design. Exploring reclaimed building materials can further elevate the rustic aesthetic while promoting environmental responsibility. Recognizing the importance of Louisiana alimony laws can be beneficial if your project involves legal considerations related to property or assets.
Choosing Durable Materials
Choosing sturdy materials is essential to guarantee your upcycled outdoor shower stands the test of time. You need materials that endure weather, resist corrosion, and age gracefully. Start by inspecting metal fixtures for rust resistance, like galvanized steel or stainless steel. Next, select weatherproof wood such as cedar or teak, which withstands moisture and decay. Third, consider repurposed tiles or stones that won’t crack or fade with exposure. Finally, look for strong, flexible hoses made from reinforced rubber or industrial-grade PVC. By prioritizing these durable options, you’ll ensure your rustic shower remains functional and attractive for years. Additionally, understanding material durability can help you choose the best options for outdoor environments to ensure longevity. Choosing materials with weather resistance is crucial to prevent deterioration over time and reduce maintenance needs. Moreover, selecting corrosion-resistant fixtures can significantly extend the lifespan of your installation in outdoor settings. Considering maintenance requirements when selecting materials can further enhance the longevity of your outdoor shower.
Designing the Layout and Shower Structure
Designing the layout and shower structure is a crucial step in creating a functional and aesthetically pleasing rustic outdoor shower. First, determine the best location, considering privacy, water access, and drainage. Sketch a layout that maximizes space while keeping it simple and natural. Decide on the shower’s size and shape, ensuring enough room for comfortable movement. Incorporate upcycled fixtures thoughtfully—place the showerhead at a height that suits all users. Think about access points, like nearby pathways or steps, so it’s easy to enter and exit. Use natural materials like wood or stone to complement the rustic theme. Keep the design minimal but practical, ensuring the structure is sturdy and weather-resistant. Choosing appropriate upcycled fixtures can enhance both the sustainability and charm of your outdoor shower. Additionally, considering automation in business such as automated irrigation or lighting can add convenience and efficiency to your outdoor space. Incorporating sustainable design principles can further ensure your shower blends seamlessly with its environment while reducing environmental impact. Proper planning of wall organization can also help keep supplies and accessories neatly stored and accessible, contributing to an overall organized outdoor area. To optimize water efficiency, installing a simple water filtration system can be a smart addition. This foundation sets the tone for a charming, functional outdoor shower.
Preparing the Site and Installing the Base

First, choose a spot that’s level, well-drained, and convenient for access. Once you’ve selected the location, start building a solid foundation using gravel or concrete to guarantee stability. This step sets the stage for a durable and functional outdoor shower. Incorporating outdoor planters into the surrounding area can enhance the aesthetic appeal and provide natural privacy. For added safety and comfort, consider incorporating a non-slip surface into the design of the shower area. Ensuring proper drainage is also crucial to prevent water pooling and maintain a safe environment. Additionally, considering the water source setup nearby can make the installation more efficient and sustainable.
Selecting the Location
Before installing your rustic outdoor shower, choosing a suitable location that balances privacy, accessibility, and practicality is essential. You need a spot that offers enough seclusion without making maintenance difficult. Consider the following:
- Make certain nearby drainage to prevent water pooling and soil erosion.
- Pick a level area for stability and easy installation.
- Stay close to existing water sources or plan for convenient hookups.
- Think about sun exposure and wind direction for comfort and drying.
Building the Foundation
To guarantee your outdoor shower remains stable and functional, start by preparing the site thoroughly. Clear the area of debris and level the ground to ensure proper drainage. Use gravel or crushed stone as a base to prevent shifting and water pooling. Compact the material well to create a solid foundation. Consider installing a concrete slab if you prefer extra stability, but ensure it’s level. Here’s a quick overview:
| Step | Description |
|---|---|
| Clear the site | Remove debris and level the ground |
| Prepare the base | Use gravel or crushed stone for drainage |
| Compact base | Ensure stability and prevent shifting |
| Optional concrete slab | For extra durability |
| Final leveling | Make sure the surface is even |
Proper preparation guarantees your shower stays sturdy and functional.
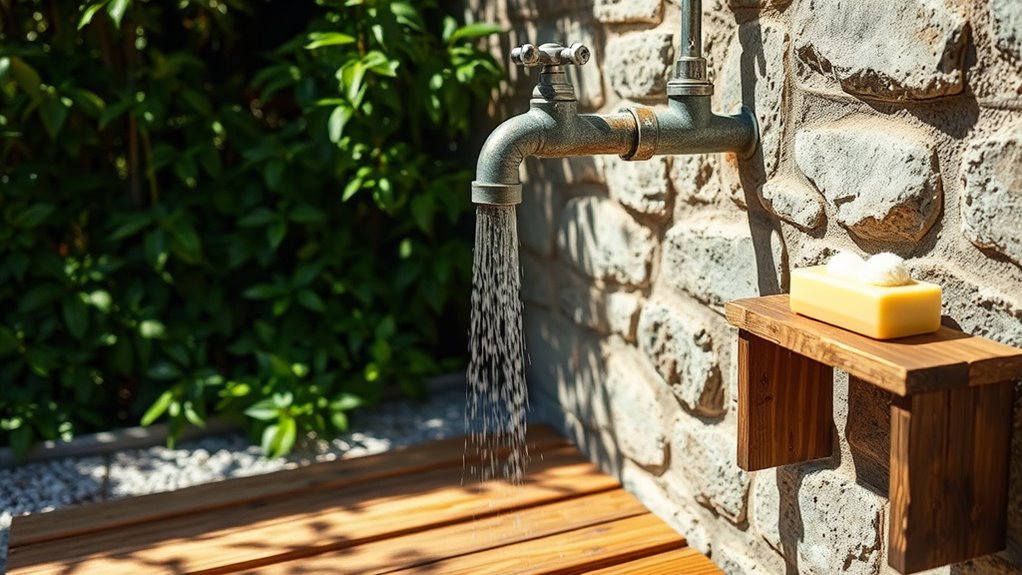
Connecting the Plumbing With Reclaimed Fixtures

Connecting the plumbing with reclaimed fixtures requires careful planning to guarantee a secure and leak-free installation. First, identify compatible fittings and connectors that match your reclaimed fixtures and existing pipes. Second, measure and cut pipes precisely to ensure a snug fit without stress points. Third, use appropriate sealants or Teflon tape on threaded connections to prevent leaks. Fourth, tighten connections securely but avoid overtightening, which can crack fixtures or damage threads. Take your time to double-check each connection for stability. By following these steps, you’ll create a reliable plumbing system that complements your rustic outdoor shower, ensuring durability and functionality with your upcycled fixtures. Proper connection is key to enjoying your shower without future plumbing issues.
Finishing Touches and Maintenance Tips
Adding finishing touches and staying on top of maintenance will keep your rustic outdoor shower looking great and functioning smoothly for years to come. Regularly check for leaks or corrosion, especially around joints and fixtures, and tighten or replace parts as needed. Keep the surrounding area clear of debris and moss to prevent slipping hazards and preserve the natural aesthetic. Consider sealing any wood surfaces annually to protect against weather damage, and clean fixtures with gentle, non-abrasive cleaners to prevent buildup. If you notice mineral deposits, soak them with vinegar and scrub gently. Cover your fixtures during harsh weather or when not in use for extended periods to prolong their lifespan. Staying proactive with these simple tips will ensure your outdoor shower remains a charming, functional retreat.
Frequently Asked Questions
How Do I Ensure Proper Drainage for My Outdoor Shower?
To guarantee proper drainage for your outdoor shower, start by choosing a location with a slight slope away from your home or surrounding area. Install a drain pan or a gravel base beneath the shower to prevent water pooling. Use a drain pipe that directs water to a safe, permeable area like a garden or dry well. Regularly check and clear the drain to avoid clogs and maintain proper flow.
What Safety Precautions Are Needed When Installing Plumbing Outdoors?
Your outdoor plumbing setup isn’t just a simple task; it’s a mission to safeguard your property from catastrophic leaks. You should wear protective gear, like gloves and goggles, to prevent injuries. Make sure you turn off water supply when working, and double-check all connections for leaks. Use weather-resistant materials, secure pipes properly, and follow local codes. These precautions keep your project safe and your outdoor space functional for years to come.
Can I Install a Rustic Shower on Uneven Terrain?
You can definitely install a rustic outdoor shower on uneven terrain, but you’ll need to prepare properly. First, level the area as much as possible or create a stable base with gravel or concrete pavers. Use adjustable or flexible plumbing fittings to accommodate uneven surfaces. Secure the structure firmly, ensuring stability. With some careful planning and proper materials, your rustic outdoor shower will work beautifully even on challenging terrain.
How Do I Prevent Theft or Vandalism of Upcycled Fixtures?
Think of your fixtures like a treasure chest—you want to protect it. To prevent theft or vandalism, you can install sturdy locks, secure fixtures to solid surfaces, and use weatherproof covers. Consider adding motion-activated lights or cameras for extra security. I once helped a friend install an outdoor faucet; after adding a lockbox, it remained untouched for years. These measures make your fixtures less tempting and more secure.
What Permits or Regulations Apply to Outdoor Shower Installations?
When planning your outdoor shower, you need to check local building codes and zoning regulations. You might require permits for plumbing, electrical, or structural work. Contact your city or county planning office to find out specific requirements. Make certain your installation complies with health and safety standards to avoid fines or future issues. It’s a good idea to review these rules early to ensure your project runs smoothly.
Conclusion
Once you’ve completed your rustic outdoor shower, you’ll have a truly one-of-a-kind oasis that’s both eco-friendly and charming. With upcycled fixtures and a bit of creativity, you’ve turned scrap into a sanctuary. Remember, a project like this is only as good as the effort you put in, so enjoy the process and take pride in your handiwork. Now, you’ve got a shower that’s ready to make waves and stand the test of time.