
Applying peel-and-stick wallpaper on textured walls can work well if you take proper steps. Start by thoroughly cleaning, lightly sanding, and applying a primer to create a smoother surface. Choose a high-adhesion adhesive or apply a clear layer of remover-friendly adhesive for better grip. Work slowly, pressing firmly along ridges, and use a smoothing tool to eliminate bubbles. For stubborn spots, gentle heat can help. Continue exploring for more tips to guarantee a perfect finish.
Key Takeaways
- Properly clean and lightly sand textured walls to create a smoother surface for better adhesion.
- Use a high-quality, wallpaper-specific adhesive or primer suited for uneven surfaces.
- Consider applying a clear, removable adhesive or a primer before applying peel-and-stick wallpaper.
- Use a heat gun or blow dryer to soften adhesive and help it conform to textured ridges.
- Work slowly, pressing firmly along ridges and smoothing out air bubbles for a seamless finish.
Applying peel-and-stick wallpaper to textured walls might seem challenging, but with the right approach, it can be a straightforward and rewarding project. The key to success starts with proper wall preparation. Textured surfaces, such as popcorn or heavily stuccoed walls, can prevent the wallpaper from adhering smoothly. To improve adhesion, you should first clean the surface thoroughly, removing dust, dirt, and grease. Lightly sanding the wall can also help create a more even surface, reducing the bumps and ridges that might cause bubbles or peeling later on. If the texture is particularly rough or uneven, consider applying a primer or a leveling compound designed for wallpapering. This step will help create a more uniform base, making your peel-and-stick wallpaper stick better and last longer.
Once the wall is prepped, choosing the right adhesive options becomes essential. Peel-and-stick wallpapers typically come with a self-adhesive backing, but textured walls may require additional reinforcement. For extra grip, you might use a wallpaper-specific adhesive or primer that enhances stickiness. Some brands offer adhesive formulas designed for high-porosity or uneven surfaces—these can improve the bonding on textured walls. Alternatively, you can apply a clear, removable wallpaper adhesive over the back of the peel-and-stick panel before sticking it to the wall. This extra layer can help guarantee the wallpaper adheres securely, especially on surfaces with significant texture. Just be cautious not to overload with adhesive, as too much can cause bubbling or make the installation messier.
When applying the wallpaper, start from a corner or a straight edge, using a smoothing tool or plastic squeegee to press out air bubbles and ensure good contact. Work slowly, paying close attention to the textured areas, pressing firmly along the ridges. If you notice any bubbles or areas where the wallpaper isn’t sticking well, gently lift and reposition that section. Using a heat gun or blow dryer can help soften the adhesive slightly, allowing you to smooth out stubborn spots on textured surfaces. Remember, patience and careful handling are vital for a seamless look.

Top Grain Leather Wallet for Men | RFID Blocking | Extra Capacity Bifold Wallet with 2 ID Windows | Ultra Strong Stitching | Slim Billfold with 8 Card Slots | Gift for Him
✅ SECURE RFID BLOCKING - Every card slot in our mens leather wallet is equipped with RFID blocking...
As an affiliate, we earn on qualifying purchases.
Frequently Asked Questions
What Types of Textured Walls Are Best Suited for Peel-And-Stick Wallpaper?
You’ll find that lightly textured walls like popcorn, knockdown, or orange peel work best for peel-and-stick wallpaper. These textured wall types offer enough surface smoothness for good wallpaper compatibility, ensuring the adhesive sticks well. Avoid heavily textured or rough surfaces like heavily stuccoed or heavily textured drywall, as they can cause bubbles or peeling. To get the best results, prepare your walls properly and choose a wallpaper designed for textured surfaces.
How Long Does Peel-And-Stick Wallpaper Typically Last on Textured Surfaces?
You can expect peel-and-stick wallpaper on textured surfaces to last around 3 to 5 years, depending on durability expectations and maintenance. To maximize its lifespan, keep the wall clean and dry, avoid excessive humidity, and prevent peeling edges by gentle pressing. Regularly check for loose spots and re-adhere if needed. Proper application and upkeep make certain your wallpaper stays vibrant and secure longer.
Can Peel-And-Stick Wallpaper Be Removed Without Damaging Textured Walls?
Wondering whether peel-and-stick wallpaper can be removed without damaging textured walls? You can, if you follow proper removal techniques. Gently peel at the edges, use a hairdryer to soften adhesive, and apply careful, slow steady pulls. For DIY repair, avoid aggressive pulling to prevent gouges or tears. Patience is key—slow, steady removal preserves your textured wall’s integrity and keeps your space looking pristine.
Are There Specific Adhesives Recommended for High-Humidity Areas?
For high-humidity areas, you should use moisture-resistant adhesives designed for damp environments, as regular adhesives may fail over time. If you’re exploring adhesive alternatives, consider specialized waterproof or mildew-resistant options that stick well and prevent mold growth. These adhesives are formulated to withstand moisture, ensuring your peel-and-stick wallpaper stays secure and looks great, even in bathrooms or kitchens. Always check the product labels to confirm they’re suitable for high-humidity conditions.
How Can I Prepare My Textured Wall Before Applying Peel-And-Stick Wallpaper?
To prepare your textured wall, start by thoroughly cleaning the surface to remove dust, dirt, and grease, ensuring better adhesion. Then, lightly sand any high points on the texture to create a smoother surface. After cleaning, apply a primer designed for textured surfaces to seal the wall and improve stickiness. This preparation helps the peel-and-stick wallpaper adhere better and last longer on your textured walls.

BULL GUARD Mens RFID Blocking Bifold Wallet Soft Genuine Leather Brown Western | Secure and Durable Extra Capacity Billfold with 11 Credit Cards, Flip Up ID
RFID Blocking Technology: Protect your data, personal information, and identity at work or during travel. We take our...
As an affiliate, we earn on qualifying purchases.
Conclusion
With a bit of patience and the right prep, peel-and-stick wallpaper can transform your textured walls into a masterpiece, like a painter’s brush dancing across a canvas. Think of it as giving your space a fresh coat of personality, turning rough terrain into a smooth, vibrant backdrop. When you follow these tips, you’ll find that your walls aren’t just surfaces—they’re stories waiting to be told, layered with color and character, ready to embrace their new identity.
Timberland Men's RFID Blocking Wallet – Genuine Leather Passcase with Removable ID Holder, 6 Card Slots, 2 Billfold Pockets, Slim Design, Navy Blue, One Size
GENUINE LEATHER - 100% Genuine Leather wallet made from a nice soft luxury leather that is smooth to...
As an affiliate, we earn on qualifying purchases.
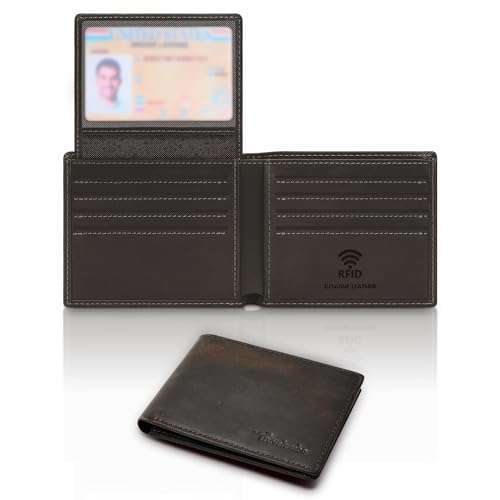
Travelambo Genuine Leather Wallet for Men with Gift Box - Handmade Bifold Stylish - Mens Wallets Rfid Blocking with 2 ID Windows
Durability and Elegance: Crafted to meet the diverse needs of men across various settings, this wallet is perfectly...
As an affiliate, we earn on qualifying purchases.