To give your furniture a stylish boho look, start with thorough cleaning and surface prep, then apply a vibrant base coat like Antebellum Blue. Layer contrasting or similar shades using techniques like dry brushing, stippling, or blending for depth and texture. Add unique effects with stencils or drips, then incorporate faux rust or age spots. Finish with wax and stain for a worn, rustic charm. Keep exploring to discover more tips and tricks.
Key Takeaways
- Prep surfaces thoroughly with cleaning or deglosser, then apply multiple thin coats of vibrant, opaque paint like Antebellum Blue for a solid base.
- Use layering techniques with contrasting or complementary hues, blending with dry brushing or stippling to add depth and visual interest.
- Incorporate texture by overlapping colors, using tools to scrape or drag wet paint, and experimenting with wet-on-wet blending for rich finishes.
- Achieve boho charm through stencil overlays, drip effects, and strategic distressing with sanding and waxes to reveal underlying layers.
- Finish with colored waxes and protective sealants like Gator Hide, then style with eclectic decor for an authentic boho look.
Surface Preparation and Initial Cleaning
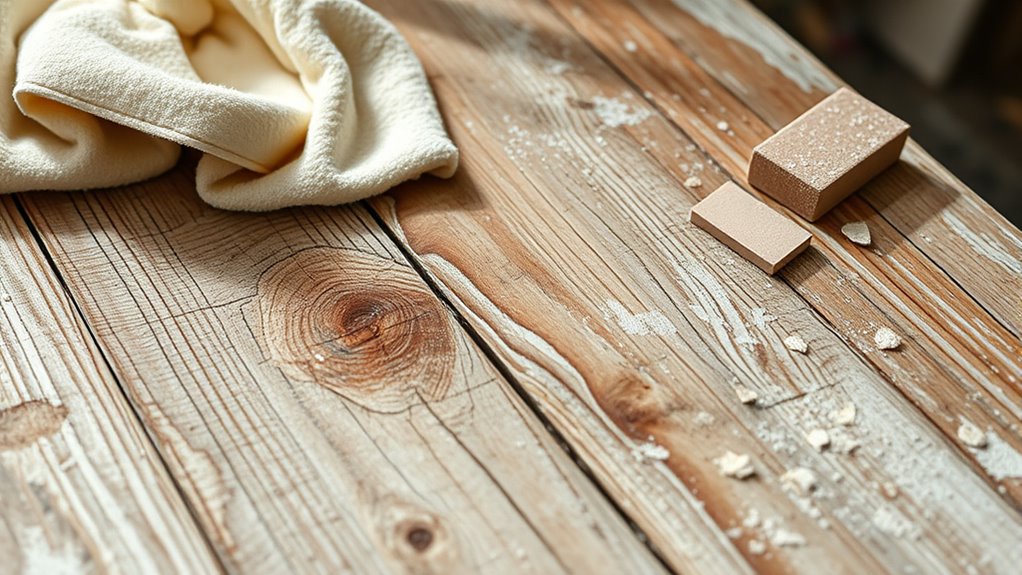
Before you start painting, it’s essential to properly prepare your furniture’s surface. Begin with thorough cleaning using Dixie Belle White Lightning or a similar deglosser to remove dirt, grease, and any gloss. This step is vital for ensuring good paint adhesion, so skip sanding or stripping if the surface is clean and smooth. Carefully remove hardware, saving any pieces you want to reuse, and clean them separately to eliminate grime. For furniture with minor damage or veneer, cleaning alone is often more effective than sanding, which can damage delicate surfaces. After cleaning, wipe all surfaces with a clean, lint-free cloth or sponge to eliminate dust. Proper surface preparation and initial cleaning are key to achieving a smooth, long-lasting paint finish. Additionally, understanding the importance of surface preparation can significantly improve the final appearance and durability of your makeover. Ensuring your furniture is free from dust and debris before painting helps prevent imperfections in the finish, which is especially important given how Louisiana alimony laws influence overall furniture and home decor choices by encouraging thoroughness in maintenance. Incorporating automation technologies into your cleaning routine can also streamline the process and ensure a more consistent surface quality. Using HEPA filtration during cleaning can further improve air quality and reduce airborne dust particles that might settle on your furniture.
Choosing and Applying the Base Coat
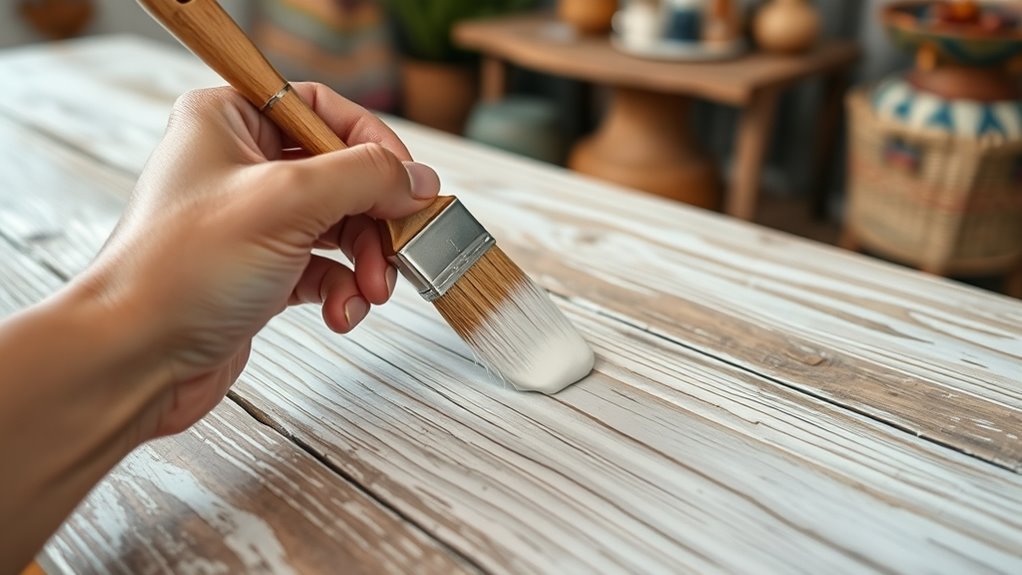
Choosing the right base coat sets the foundation for a stunning furniture transformation. Select a solid, opaque paint like Antebellum Blue for a vibrant background that highlights your layered textures. Before applying, make sure the surface is thoroughly cleaned and dust-free to guarantee good adhesion. When applying the base coat, use even, smooth brush strokes or a roller to spread the paint in thin layers. This technique helps prevent drips and uneven coverage. It’s better to apply multiple thin coats rather than one thick layer, as this results in a more durable finish and a professional look. Allow each coat to dry completely—usually 1-2 hours—before moving on to the next step. Proper application of your base coat is key to achieving a flawless boho furniture makeover. Additionally, using a quality paint designed for furniture can enhance adhesion and overall finish durability. To ensure optimal results, consider the type of paint suitable for the material you are working with, which can improve longevity and appearance. Selecting the appropriate paint primer can also help improve coverage and adhesion, especially on tricky surfaces. For the best results, avoid toilet flushing or other water-related activities nearby, as humidity can affect paint drying and adhesion.
Layering Colors for Depth and Texture
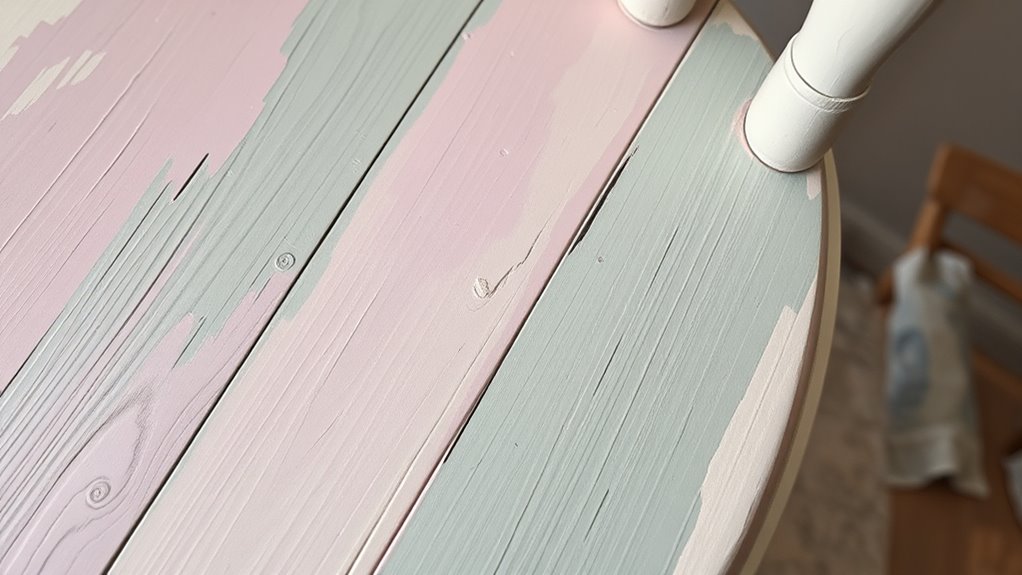
To add depth and texture, start by selecting contrasting or complementary hues that enhance your piece’s visual interest. Use techniques like dry brushing or stippling to blend colors softly and create a natural, layered look. Remember to let each layer dry completely before adding the next to keep your finish vibrant and well-defined. Incorporating vintage decor can further enhance the rustic charm and authenticity of your piece. Additionally, understanding risk assessment in merchant services can help you evaluate potential pitfalls when adopting new techniques or materials in your DIY projects. Exploring wicks and waxes can provide insight into selecting appropriate materials for different effects and safety considerations. Being aware of regional legal resources can also prove beneficial if you seek professional guidance or legal advice for your creative endeavors. Also, considering proper cleaning and maintenance techniques can extend the lifespan and appearance of your finished furniture.
Choosing Complementary Hues
Layering complementary hues is a powerful way to add visual depth and vibrancy to your boho furniture makeover. By combining complementary hues like blue and orange or red and green, you create striking contrasts that emphasize your piece’s character. Use layering colors thoughtfully, blending techniques help seamlessly merge shades, making smooth and natural progressions. Incorporate various shades within the same color family, such as peony and coral, to add texture without overwhelming the design. Contrasting yet harmonious colors in multiple layers highlight distressing and reveal underlying tones, creating a rich, textured appearance. When selecting colors, guarantee they share similar undertones for easier blending and a cohesive, boho-inspired aesthetic. This approach elevates your furniture, making it truly unique and visually engaging. Additionally, understanding the color theory behind hue combinations can help you make more informed choices for a balanced and appealing final look. Exploring personalities traits can also inspire your color choices by reflecting different moods and atmospheres you wish to evoke in your space. Incorporating sound healing principles, even subconsciously, can enhance your creative process by promoting relaxation and focus during your project. Moreover, integrating AI-assisted design tools can provide valuable insights and suggestions to refine your color palette choices. Recognizing the importance of living room decor can help guide your overall design strategy to create a harmonious environment.
Building Visual Depth
Building visual depth in your boho furniture makeover involves skillfully layering contrasting and harmonious colors to add complexity and richness. Start by applying multiple layers of paint, using colors like blues, oranges, or metallics, to create a sense of dimension. Use blending techniques with tools like stipple brushes or putty knives to seamlessly integrate these layers, enhancing texture and depth. Incorporate glazing or transparent waxes over your layers to emphasize underlying hues, adding a multi-dimensional effect. Allow semi-dry or wet paint to bleed slightly for subtle progressions that mimic movement and add visual interest. Finally, lightly sanding certain areas reveals underlying layers and textures, amplifying the depth and making your piece stand out with dynamic, boho charm.
Blending Techniques for Texture
Blending techniques are essential for creating rich textures and depth in your boho furniture makeover. By layering multiple colors in a random, overlapping manner, you build complex textures on your surface. Use stippling, dry brushing, or dragging techniques to add variety and interest. Slightly dampen your paint layers with water spritzes to allow colors to blend seamlessly, creating soft gradations between shades. Incorporate contrasting hues, like warm and cool tones, and vary your application methods to achieve a dynamic, textured look. Tools like putty knives or brushes help scrape or drag wet paint, revealing underlying layers and enhancing visual interest. Remember to let each layer dry thoroughly before adding new colors or distressing to maintain clarity and depth in your layered finish. Additionally, understanding paint viscosity and proper dilution techniques can help you achieve smoother blends and more controlled textures. Recognizing the importance of layering techniques allows for more sophisticated and nuanced finishes, especially when working with distressed styles. Furthermore, controlling paint consistency ensures better adhesion and a more professional appearance in your final piece. Being mindful of your brush selection can also influence the texture and overall effect you achieve, adding another layer of customization to your project. When working with layered paints, experimenting with different application methods can lead to unique and personalized finishes.
Creating Unique Effects With Stencils and Drips
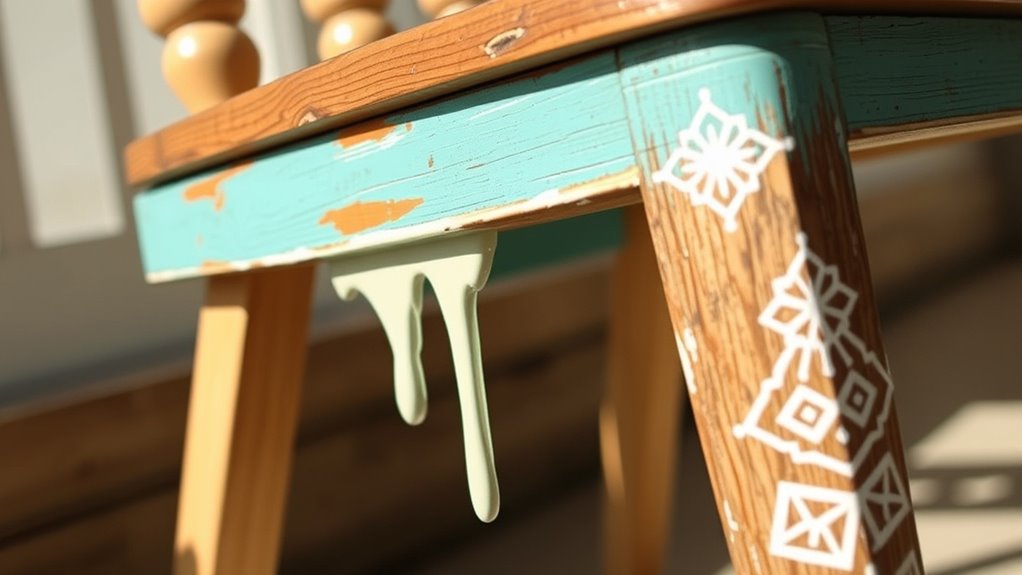
To create eye-catching effects on your boho furniture, start by using reusable stencils like Redesign With Prima’s Stick N’ Style to add precise, textured patterns with metallic or bright acrylic paints. Apply stencils in a random, overlapping manner across drawers or surfaces to develop an eclectic, layered look that’s quintessentially boho. Once the stenciled designs are dry, introduce drip effects by spraying water or wet paint over the layered colors. Use a brush or tongue depressor to drag or dab paint, creating a distressed, aged appearance. Layering stencils and drip effects enhances the textured, artistic style, making each piece unique. Remember to let each layer dry before adding new effects to prevent smudging, and experiment with placement for a dynamic, boho-inspired finish. Regularly monitoring your progress and adjusting techniques can help achieve the best results, especially when incorporating textile techniques to add depth and dimension to your piece. Additionally, considering the use of honey-based natural products can subtly influence your creative projects by inspiring warm, organic color palettes and textures.
Adding Faux Rust and Ageing Details
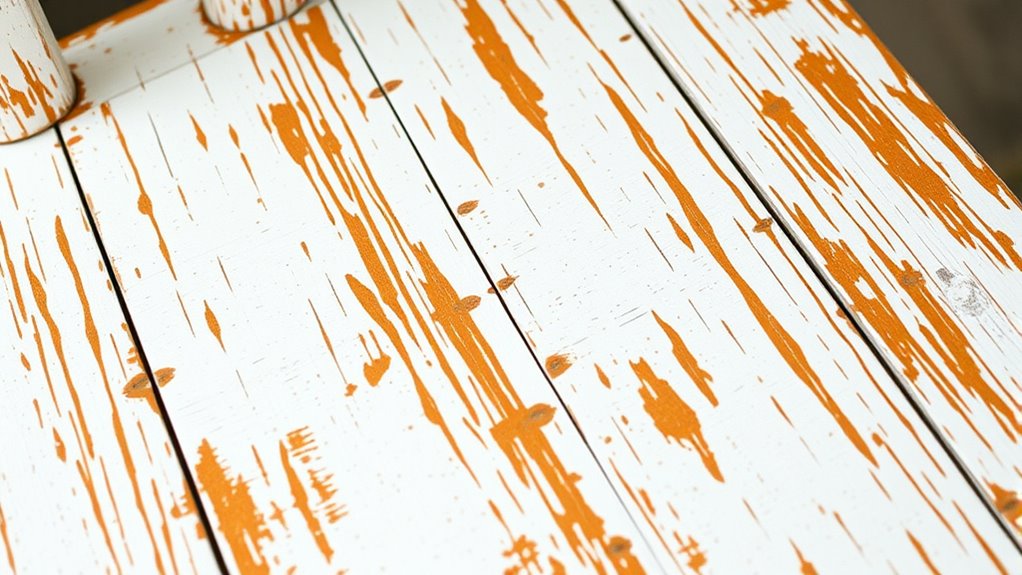
To create convincing faux rust, layer Rusty Nail and Coffee Bean paints onto metal surfaces, then use a wet brush or mister to add drips and streaks for a natural look. Sand distressed areas after applying the rust colors to reveal underlying layers and enhance the aged effect. Finish by applying colored wax into cracks and sealing with Gator Hide for a durable, authentic patina.
Achieving Authentic Rust Effects
Achieving authentic rust effects involves carefully layering colors and textures to mimic the natural aging process. Start by applying rusty colors like Rusty Nail and Coffee Bean over metal areas to create a realistic base. Lightly sand the surface afterward to distress it and reveal underlying layers, enhancing the worn look. Use a mister bottle to dampen painted surfaces, then add drip effects with brushes or tongue depressors for an aged, rusted appearance. To mimic patina and staining, apply colored waxes such as Florida Orange mixed with clear wax into cracks and crevices. Finish by sealing your work with a protective topcoat like Gator Hide, ensuring the textured rust effects stay preserved and authentic-looking over time.
Applying Ageing and Distress Techniques
Adding faux rust and aging details brings your furniture to life with authentic, weathered charm. To achieve this, layer Rusty Nail and Coffee Bean paints on metal parts, then sand lightly to reveal underlying colors. Use a wet brush to add drip effects for a realistic aged look. Distressing involves sanding areas like legs and panels after painting, exposing layers beneath and creating natural wear. To enhance aged details, apply rust-colored waxes, such as Dixie Belle’s Florida Orange mixed with clear wax, to accentuate cracks and crevices. Using a spritz of water before applying gel stain like Tobacco Road helps create an uneven, aged patina. Final touches include lightly sanding distressed areas and applying dark wax or Dixie Dirt to deepen shadows and mimic dirt accumulation.
| Technique | Materials Used | Effect |
|---|---|---|
| Faux rust layering | Rusty Nail, Coffee Bean paints | Authentic, weathered metal look |
| Distressing | Sandpaper, fine grit | Reveals underlying colors, natural wear |
| Aging details | Rust-colored wax, gel stain | Enhances cracks, adds depth |
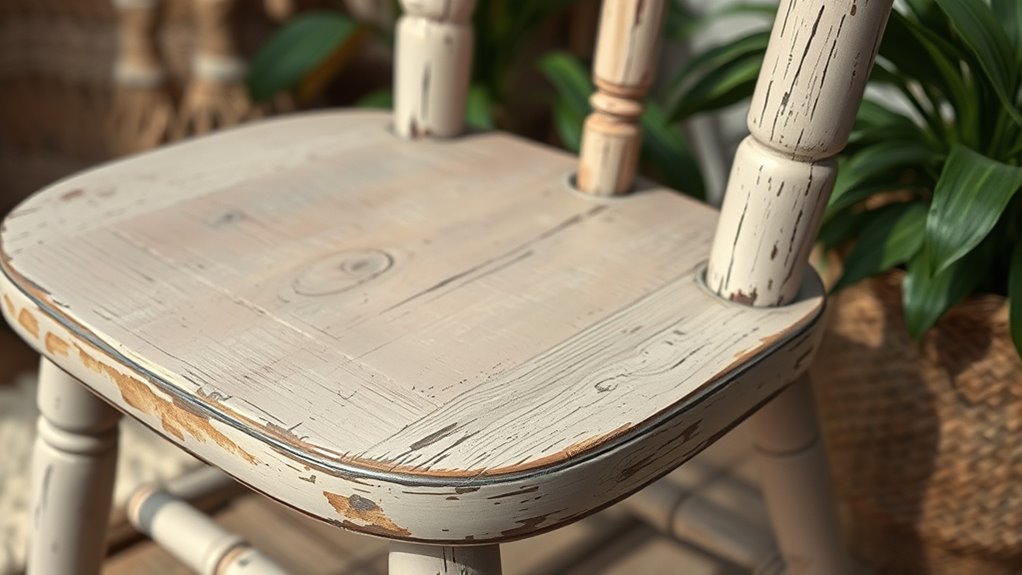
Distressing Techniques to Achieve a Worn Look
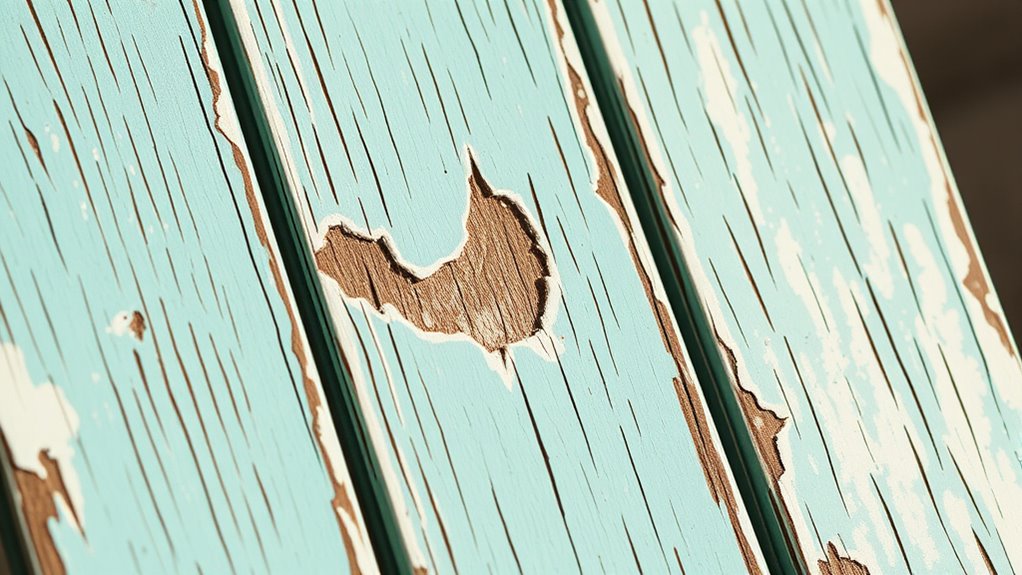
Distressing furniture to achieve an authentic worn look involves carefully removing small amounts of paint or finish in targeted areas. To start, use a fine-grit sandpaper or sanding sponge to gently distress edges, corners, and spots where natural wear would occur. Focus on high-traffic or naturally distressed areas like drawer fronts, tabletops, or edges to enhance realism. Before distressing, let the paint or wax dry completely to prevent smudging or pulling off layers. Lightly sand over painted surfaces using circular or back-and-forth motions to expose underlying colors or wood, adding depth. For a softer, more natural effect, dampen the surface with a cloth or spritz bottle before sanding. This technique helps create a subtle, aged appearance on your wood furniture.
Finishing Touches With Wax and Stain

To enhance the depth and warmth of your furniture, applying wax and stain as finishing touches can make a significant difference. Use colored wax, like Florida Orange mixed with clear wax, to accentuate crevices and details, adding richness and dimension. For a subtle deepen of color and an aged patina, apply a water-based gel stain such as Tobacco Road over the wax. Be sure to allow at least 24-48 hours for the wax or stain to cure fully before sealing, preventing smudges or removal. Use a synthetic brush for wax and a long-bristled brush for stain to ensure smooth, even coverage. Once dried, seal your piece with Gator Hide to lock in the color, boost durability, and achieve a polished, protective finish.
Styling and Final Presentation of Your Boho Piece
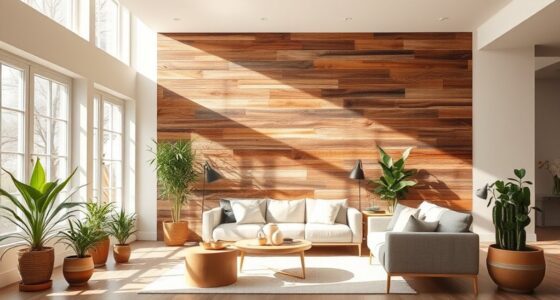
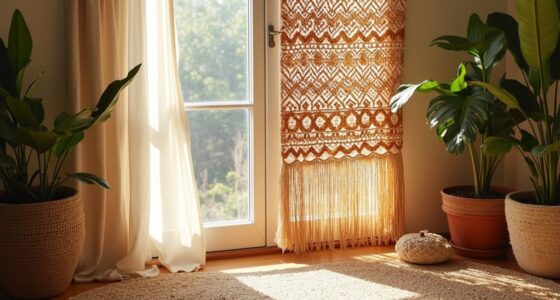
Now that your furniture piece has its beautiful finish with wax and stain, the next step is to style it for maximum visual impact. Embrace its distressed, layered look by adding eclectic accessories that enhance its boho vibe. Use layered textiles, vintage hardware, or decorative items that complement the textured, worn finish. Incorporate a protective topcoat like Gator Hide to seal the layers and maintain durability while highlighting the distressed details. Stage your piece in a well-lit space with matching decor to showcase its vibrant colors and artistic craftsmanship. Capture close-up photos of the layered, distressed areas to highlight the depth and character. Proper styling and strategic presentation will turn your DIY makeover into a mesmerizing focal point.
| Styling Tip | Example |
|---|---|
| Layer Textiles | Use throws or rugs with boho patterns |
| Vintage Hardware | Add aged handles or knobs |
| Decorative Items | Incorporate plants or eclectic art |
| Lighting | Use warm, ambient lighting for impact |
Frequently Asked Questions
How Do You Make Painted Furniture Look Distressed?
To make painted furniture look distressed, start by lightly sanding the edges and surfaces with fine grit sandpaper to reveal some wood or previous paint layers. Use a dry brush or damp cloth to gently soften or remove excess paint, creating a worn look. Apply darker wax into crevices and wipe it back, accentuating detail. Finish with a protective sealant to preserve the distressed appearance and prevent further damage.
How to Antique Furniture After Painting?
To antique furniture after painting, start by applying a dark wax or glaze into the crevices, then wipe off the excess for an aged look. Next, use a water-based gel stain over the surface to add depth and a vintage feel. Lightly distress with fine sandpaper to reveal underlying layers, then apply tinted wax in selected areas for more character. Finish with a protective topcoat to seal and preserve your antique effect.
How to Paint a Piece of Furniture?
Ever wonder how to transform a piece of furniture? Start by cleaning and lightly sanding it to guarantee paint sticks well. Then, apply a bold base color, like Antebellum Blue, to set the stage. Use brushes or sponges to add layered textures and colors, blending as you go. Finally, distress the surface to reveal hints of the layers beneath, and seal it with a protective topcoat for a stunning, customized finish.
Conclusion
Now that you’ve learned these techniques, your furniture piece transforms into a canvas of boho charm, reflecting your personal touch. Like a painter’s brushstroke, each step adds character and depth, turning a simple project into a masterpiece. Embrace the process, experiment freely, and let your creativity shine through. With patience and passion, your DIY makeover becomes a timeless expression of style—proof that even the most ordinary piece can become extraordinary.