
Reupholstering your old chair with boho fabrics is a great way to give it fresh personality and style. Start by choosing bold, ethnic, or geometric patterns in earthy or vibrant hues that match your decor. Carefully remove the old fabric and inspect the frame, repairing any damage. Attach your new fabric tightly using a staple gun, then add decorative trim for a polished finish. Keep your chair looking beautiful longer with simple maintenance tips—learn more to craft a truly unique piece.
Key Takeaways
- Remove old upholstery and inspect the wooden frame for repairs before attaching new boho fabric.
- Select bold, ethnic, or geometric patterned fabrics in earthy or vibrant hues for authentic boho style.
- Carefully stretch and staple fabric evenly around the frame, starting from the center of each side.
- Add decorative trim, piping, or cultural details to enhance the boho aesthetic and personalize the piece.
- Finish with protective sprays and regular maintenance to ensure durability and long-lasting beauty.
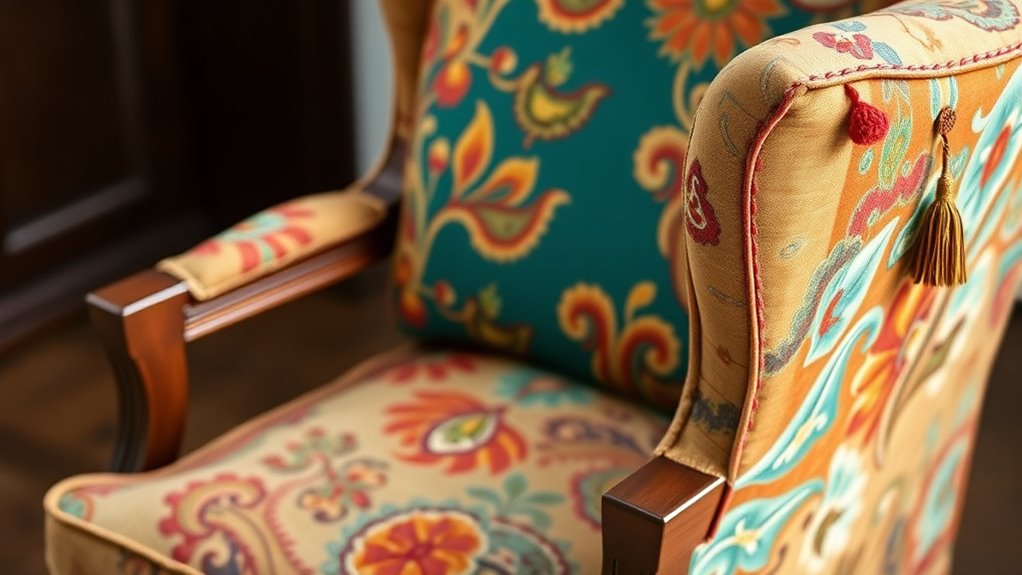
Choosing the Perfect Boho Fabrics to Transform Your Chairs
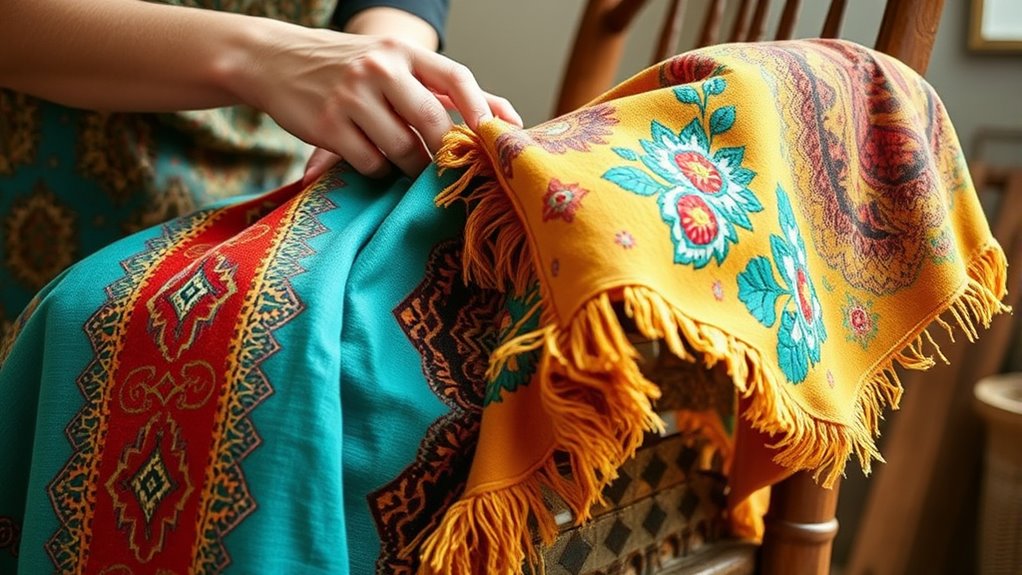
When choosing the perfect boho fabrics to transform your chairs, it’s essential to contemplate the patterns, textures, and colors that will enhance your space. Boho fabrics often feature bold geometric patterns, ethnic motifs, or painted-like designs that bring an artistic, relaxed vibe to your home decor. Look for textiles like mud cloth, painted canvas, or performance velvets with intricate or abstract patterns in earthy tones or vibrant hues. Selecting fabrics with large-scale prints works well for tall or prominent chairs, making the patterns more impactful. Natural fibers like linen, cotton, or textured blends are popular choices, emphasizing the organic, laid-back style typical of boho decor. Coordinate your fabric choices with your room’s color palette, focusing on warm neutrals, deep blues, terracotta, or metallic accents for a cohesive look. Incorporating essential oils for diffusion into your space can enhance the calming and inviting atmosphere created by your new upholstery. Additionally, choosing fabrics that reflect the bedroom ambiance can help unify your decor style, creating a harmonious and inviting environment. Considering fabric durability and ease of maintenance ensures your reupholstered furniture remains beautiful over time, especially in high-traffic areas. Exploring the benefits of curiosity can inspire you to experiment with different textures and patterns, elevating your design process. Moreover, paying attention to the quality of fabric ensures durability and longevity for your reupholstered pieces, maintaining their beauty over time.
Preparing and Repairing the Old Frame for a Fresh Start
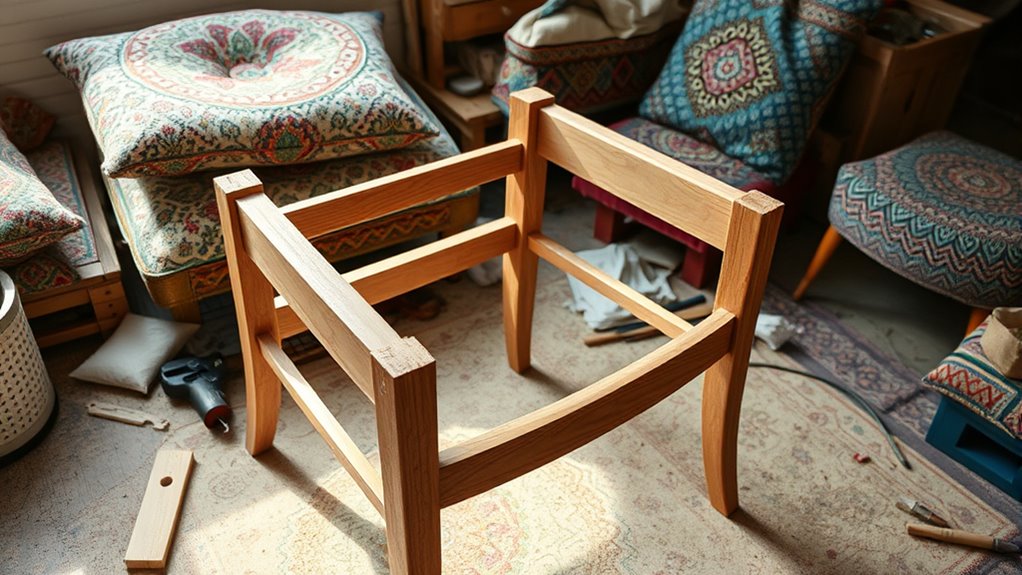
Before reupholstering, you need to prepare and repair the old frame to guarantee your furniture is sturdy and long-lasting. Start by carefully removing any existing upholstery, tacks, and nails to expose the wooden frame. Inspect the old chair’s wooden frame for loose joints or cracks, and reinforce these areas using wood glue and screws. Sand down worn or damaged sections to create a smooth surface, preparing it for finishing or painting. If the foam or batting is disintegrated, replace it with fresh padding to restore comfort and shape. Once repairs are complete, clean the wooden surface thoroughly and apply a protective finish like wax or stain. This process ensures your old chair’s frame is solid and ready to support new, stylish upholstery. Incorporating proper calibration of your tools and materials can also help achieve a more professional and durable result. Being aware of common pitfalls during repair can help you avoid costly mistakes and ensure your project’s success. Additionally, considering the quality of materials used can significantly impact the longevity and appearance of your reupholstered furniture. Recognizing the importance of attention to detail throughout the process can further enhance the durability and aesthetic appeal of your finished piece, while also aligning with best practices in furniture restoration.
Step-by-Step Guide to Removing Old Upholstery and Fabric
Start by carefully prying up and removing any upholstery tacks, staples, or nails with pliers or a painter’s tool to prevent damaging the wood frame. Gently peel back the fabric, foam, and batting, checking for any damage or loose joints that need repair. Keep track of the fabric pattern and measure the old pieces to use as templates for your new boho fabrics.
Removing Old Fabric
To remove old fabric effectively, carefully pry up and remove any staples or tacks holding it in place using a flat-head screwdriver or an upholstery tool. This step is essential to avoid damaging the frame. Once loose, gently peel back the fabric, noting any glued or sewn areas, and detach it from the foam and padding without tearing. To make this process smoother, consider these tips:
- Use pliers to pull out stubborn nails or tacks, especially in tight spots.
- Work in sections to prevent tearing or damaging the fabric.
- Set aside reusable fabric pieces for future projects or inspiration.
Detaching Upholstery Tacks
Carefully detaching upholstery tacks is a crucial step to guarantee a smooth fabric removal process. Use a flathead screwdriver or an upholstery removal tool to gently pry up and loosen the tacks from the furniture frame. Apply steady, gentle pressure to prevent damaging the wood or breaking the tacks. If the tacks are bent or deeply embedded, grip them firmly with pliers and carefully extract them. Work in small sections, lifting the fabric and tacks gradually to avoid tearing or ripping the material. Collect the removed tacks and set them aside for reuse or proper disposal to keep your workspace clean. Taking your time ensures you remove the upholstery tacks effectively without harming the furniture or damaging the fabric. Incorporating project management support can help streamline the reupholstering process and keep your project organized. Additionally, understanding best gelato in Laguna Beach can inspire a delightful treat to enjoy during your project breaks. Remember that maintaining a positive vibrational energy while working can make the process more enjoyable and aligned with your creative intentions. Being aware of safe removal techniques can also prevent injury and ensure the integrity of your furniture during the process. Being mindful of AI applications in learning and entertainment can further enhance your crafting experience by providing helpful tutorials and inspiration.
Attaching New Boho Fabric: Tips for a Taut and Even Finish
When attaching your boho fabric, start by pulling it tight before stapling to avoid wrinkles. Place staples about half an inch apart and evenly along the edges, ensuring consistent tension across the surface. Remember to secure the fabric at the center of each side first, then work outward for a smooth, even finish.
Stretch Fabric Before Securing
Before securing the fabric, it’s essential to stretch it taut to achieve a smooth, professional look. Proper tension ensures your boho fabric looks vibrant and stays in place. To do this, follow these steps:
- Start at the center of each side, gently pulling the fabric to eliminate wrinkles and sagging.
- Use your hands or a staple puller to stretch the fabric before securing each staple.
- Work outward toward the corners, maintaining consistent tension throughout.
This process helps avoid overstretching, which can distort patterns or cause puckering. Regularly check the fabric to ensure it remains smooth and taut. Properly stretching fabric before securing guarantees a sleek, even finish that transforms your furniture.
Place Staples Strategically
To guarantee your fabric stays smooth and secure, place staples at regular intervals along the edges. Start by placing staples approximately 1/2 inch apart to ensure a secure attachment. Begin stapling from the center of each side and work outward, which helps distribute tension evenly and prevents puckering. Be careful not to place staples too close to the edge; leave about 1/4 inch margin to avoid tearing the fabric. Use a staple gun with adjustable depth to control how deeply staples penetrate the wood, helping you achieve a taut finish. As you staple, regularly check and smooth the fabric, pulling it taut before securing each staple. Incorporating cultural intelligence into your approach can help you better understand the style preferences of different design aesthetics, ensuring your reupholstered piece appeals to a diverse range of tastes. This strategic placement of staples will give your reupholstered piece a professional, even appearance.
Maintain Consistent Tension
Maintaining consistent tension is essential for a smooth, professional-looking finish when attaching your boho fabric. To achieve this, start stapling in the center of each side and work outward, keeping the fabric taut. Use a staple gun with adjustable pressure to prevent over-tightening, which can cause puckering or distortion of the fabric. Regularly check the fabric’s tautness as you staple, adjusting your hand tension to avoid sagging or wrinkles. When securing fabric across curved surfaces, pull gently but firmly to keep it smooth and avoid slack or bunching. Remember these key steps:
- Maintain consistent tension throughout the process.
- Space staples approximately 1/2 inch apart for even distribution.
- Press each staple firmly for a professional, taut finish.
- Understanding gold products can help you select the most suitable materials for your project. Additionally, incorporating sound healing science principles can promote relaxation and focus during your upholstery work, enhancing your overall crafting experience.
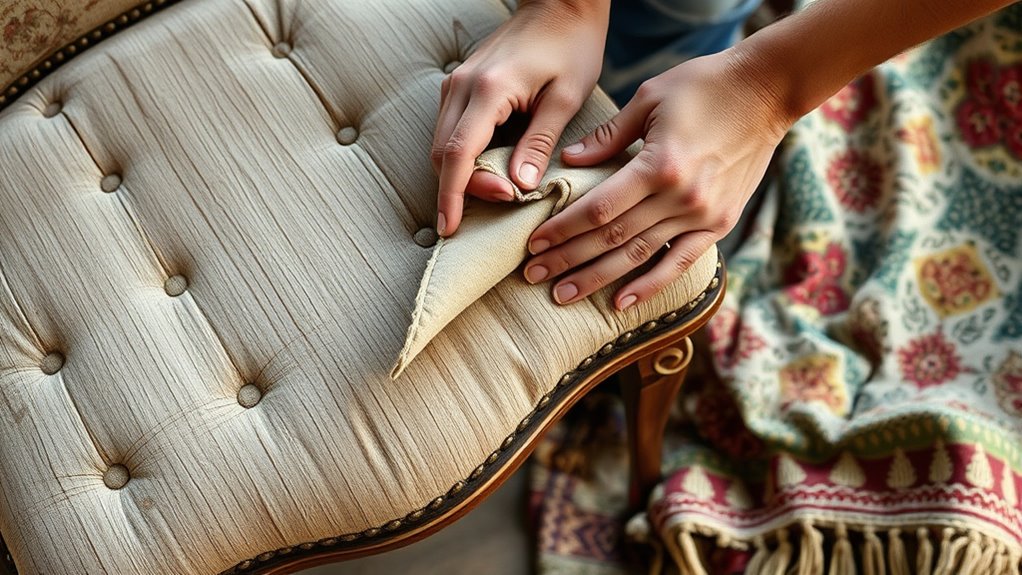
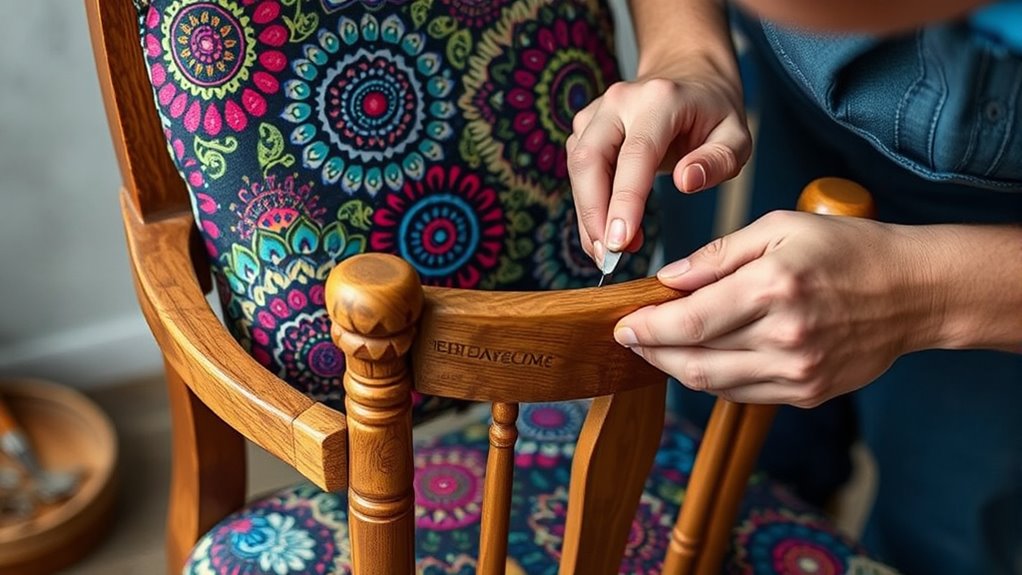
Finishing Touches: Adding Trim, Welting, and Decorative Elements
Adding trim, welting, and decorative elements can substantially elevate the finished look of your reupholstered furniture. Welting, or piping, along the edges creates a polished, professional finish and helps hide staple or seam lines. Using trim like braided jute cord or fabric-covered piping adds visual interest and complements your boho aesthetic. To guarantee a seamless look, attach trim with hot glue or fabric adhesive, especially in hard-to-reach corners. Start the trim at inconspicuous areas, such as the back or inside of the chair, to hide the seams. Carefully tack or glue decorative elements over staples or raw fabric edges, creating a cohesive appearance while preventing fraying. These finishing touches give your piece a refined, stylish look that enhances its overall charm. Incorporating knitting kits for beginners can also inspire you to add personalized textile details to your furniture for a unique touch. Additionally, understanding Louisiana alimony laws can help you plan for financial aspects during the reupholstering project and future related expenses. Paying attention to furniture finishing techniques ensures a durable and attractive result that lasts over time. Exploring unique craft traditions may inspire new decorative elements that resonate with your boho style and local heritage.
Tips for Maintaining Your Reupholstered Chair for Long-lasting Beauty

Keeping your reupholstered chair looking beautiful over time requires regular care and attention. To guarantee your boho fabric stays vibrant and fresh, follow these maintenance tips:
- Use a fabric protector spray to resist stains, spills, and moisture, making cleaning easier and extending your chair’s lifespan.
- Regularly vacuum or brush the fabric to remove dust and prevent dirt buildup that can degrade the material.
- Keep the chair out of direct sunlight to prevent fading and color loss, preserving its lively boho charm.
- Consider precious metals IRA investments to diversify your retirement portfolio and enhance your long-term financial security, which can help fund future home improvements or furniture updates.
Additionally, check and tighten staples or tacks periodically to maintain a neat appearance and prevent sagging. Attend to spills promptly with a gentle blot and mild cleaner to protect your fabric’s color and texture. Proper maintaining will keep your chair stunning for years.
Frequently Asked Questions
Is It Worth Reupholstering an Old Chair?
You might wonder if reupholstering an old chair is worth it. The answer is yes if you want to save money and preserve sentimental or vintage pieces. It’s a great way to breathe new life into your furniture, especially with trendy boho fabrics that can update its look. Plus, it’s eco-friendly, reduces waste, and lets you customize your space stylishly. Overall, it’s a smart investment in both your home and the environment.
How to Spruce up an Old Chair?
Did you know that reupholstering can extend a chair’s life by up to 20 years? To spruce up an old chair, first remove the worn fabric and any damaged padding. Reinforce loose joints, then select a bold boho fabric that matches your decor. Stretch it tightly over the frame, secure with a staple gun, and add decorative touches. This refreshes your chair, making it both stylish and functional.
How Much Does It Cost to Reupholster a Fabric Chair?
Reupholstering a fabric chair costs between $200 and $600 on average, depending on size and fabric choice. If you do it yourself with affordable materials, you might spend as little as $50 to $150. Hiring a professional usually costs $300 to $800, especially for high-end fabrics or intricate designs. Additional expenses like frame repairs or new padding can add $50 to $200, so plan accordingly.
Do You Have to Remove Old Fabric When Reupholstering?
You don’t always have to remove old fabric when reupholstering, but it’s often recommended. If the existing fabric is in good shape and securely attached, you might layer new fabric over it. However, eliminating the old fabric ensures a smooth surface, helps assess the padding and frame, and prevents issues like puckering or mold. Ultimately, stripping the old fabric usually results in a more durable, professional-looking finish.
Conclusion
Now that you’ve reupholstered your chair with trendy boho fabrics, it’s ready to shine in your space. Keep it clean, avoid the drama of a Victorian tearoom, and enjoy its fresh vibe. With a little care, your handmade piece will last for many seasons—like a trusty old friend, only more stylish. Remember, a well-loved chair is timeless, even in a world that’s constantly changing. So sit back, relax, and admire your beautiful craftwork!