
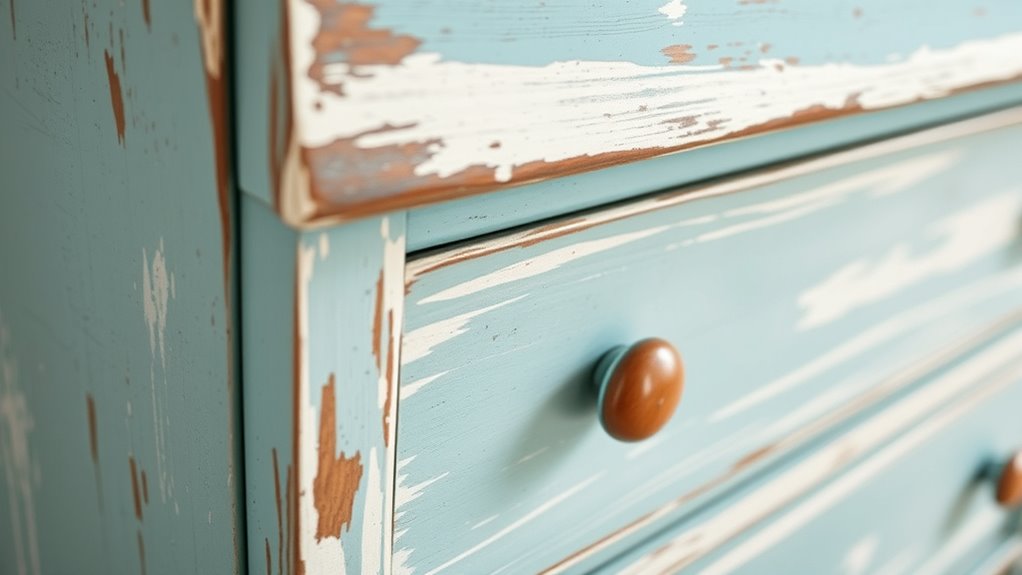
To turn dull furniture into boho chic, start by thoroughly cleaning and prepping the surface with sanding and deglossing to guarantee smooth paint adhesion. Layer vibrant colors using blending, stippling, and textured techniques, then distress edges and high spots to create a weathered look. Add faux rust, stencils, and wax for depth. Finish with stain and sealers for protection. Keep experimenting with textures and details—more tips await as you continue!
Key Takeaways
- Start by thoroughly sanding the furniture with medium grit to remove the dull finish and create a smooth base.
- Apply layered, contrasting colors using stippling, dry brushing, or random strokes for a textured boho look.
- Use distressing techniques like selective sanding on edges and worn spots to achieve a weathered, rustic appearance.
- Incorporate faux finishes such as faux rust or metallic accents for added boho charm and visual interest.
- Finish with high-quality sealers and personal touches like stencils or waxes to protect and personalize the piece.
Preparing Your Surface for a Flawless Finish
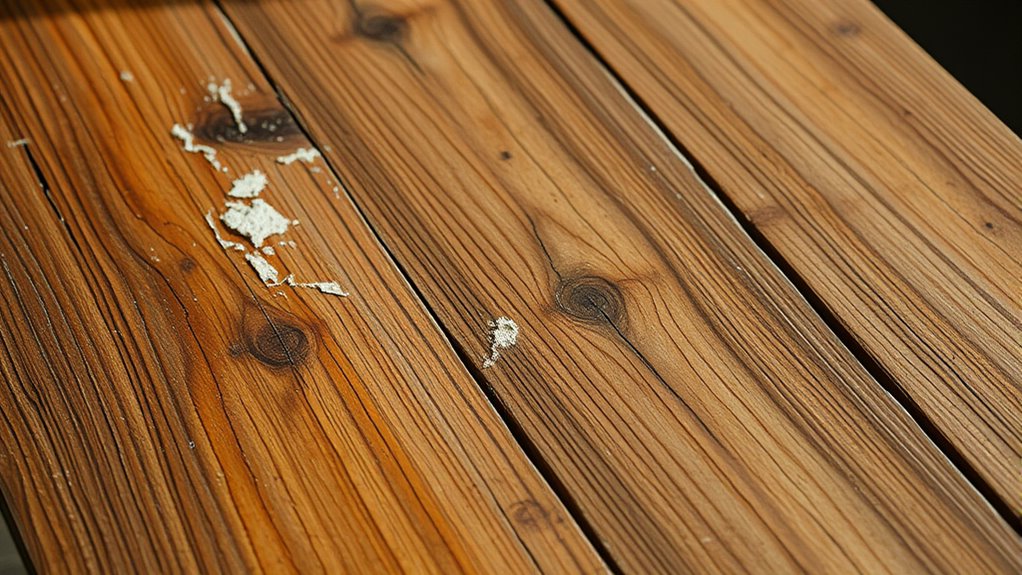
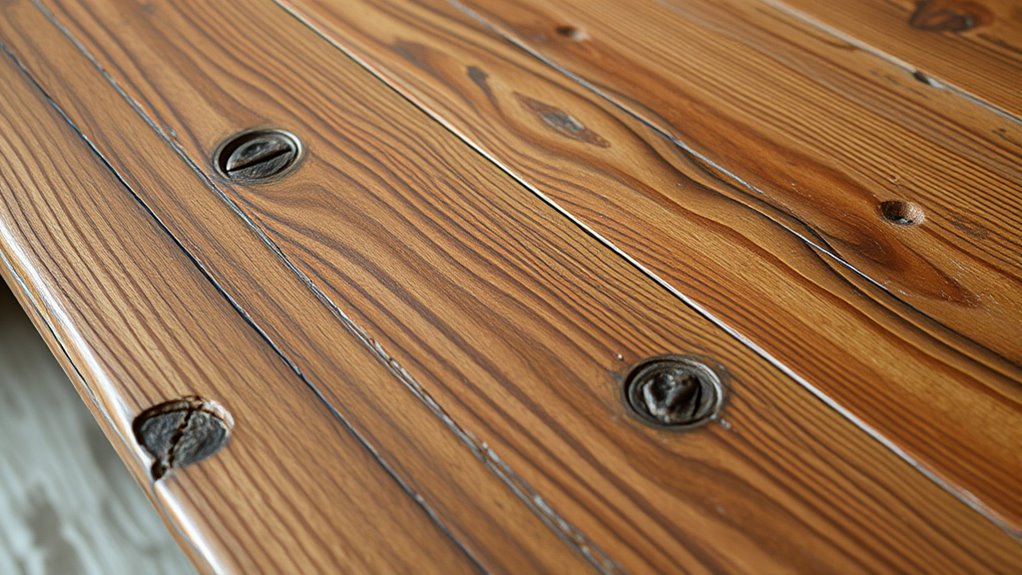
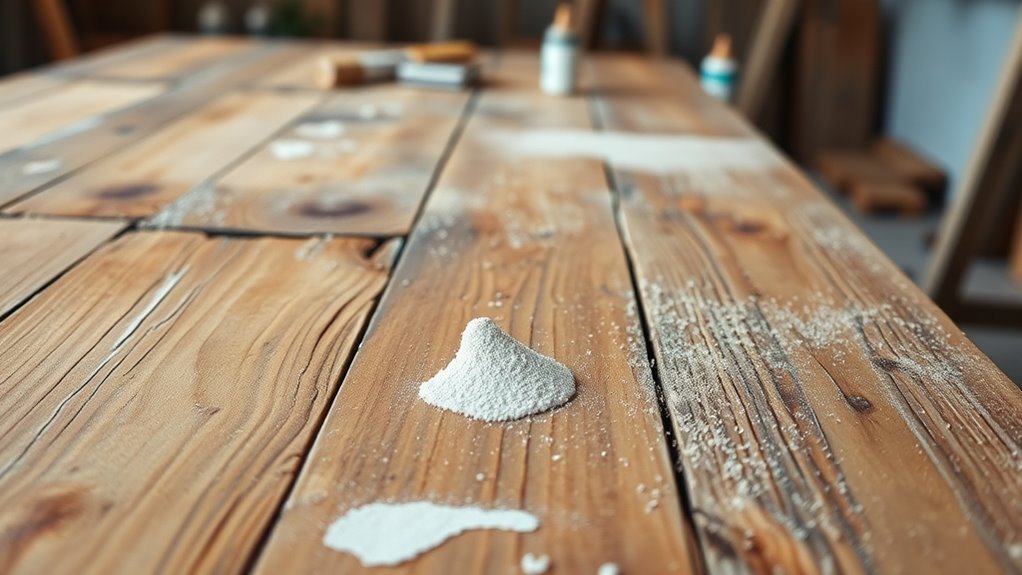
To achieve a flawless finish on your wood furniture, proper surface preparation is essential. Start by sanding the entire surface with a 5-inch orbital sander using medium grit; this removes the factory finish and creates a smooth base for paint. After sanding, make sure you thoroughly remove all dust with a tack cloth or a damp rag to prevent imperfections. Dust removal is vital for a clean surface that promotes better paint adhesion. Next, use Dixie Belle White Lightning to degloss the surface, helping to eliminate any remaining gloss and further improve adhesion. Proper surface preparation also includes masking off surrounding areas with painter’s tape to protect edges. Focusing on sanding, dust removal, and surface prep guarantees your paint will adhere well and your finish will look polished and professional. Additionally, understanding the importance of surface adhesion can ensure your refinished furniture maintains its beauty over time, especially since a well-prepared surface enhances paint durability and longevity. Incorporating a quality primer can also enhance paint adhesion and provide an even base for your chosen finish. Remember, a smooth surface will not only improve the appearance but also make the entire refinishing process more satisfying.
Building Vibrant Color Layers With Texture and Blending Techniques

To build vibrant color layers, start by mixing contrasting hues like barn red with Sea Spray or Kernel Mustard with Sea Spray to add depth. Use stippling, dry brushing, or random strokes with chips or foam brushes to create textured, layered effects. Make sure each layer dries completely before blending to achieve seamless progressions and a rich, multi-dimensional look. Incorporating eco-friendly recycled materials in your planters can also inspire creative color choices and textures that complement your furniture refinishing projects. Additionally, experimenting with different texturing techniques can further enhance the visual interest and authenticity of your distressed furniture. Exploring creative play in your projects can provide new ideas for finishes and styles that reflect your personal taste and financial goals. Remember, practicing various eco-friendly crafting methods can help you develop unique finishes that are both beautiful and sustainable.
Layering With Contrasting Hues
Building vibrant, textured layers with contrasting hues involves applying thin coats of colors like barn red, Kernel Mustard, and Mermaid Tail carefully and intentionally. To achieve layered colors that create depth, use textural techniques such as stippling, random strokes, and dry brushing with a chip brush or foam roller. These methods add dimension and visual interest while maintaining control over blending. These techniques also help mimic the natural variations found in holistic healing practices, adding authenticity to your distressed finish. Make sure each layer dries completely before adding the next to prevent muddiness and allow for clean progressions. Lightly sand between layers with 220 grit or higher to reveal underlying colors and enhance the distressed look. Incorporate blending techniques like feathering and subtle transitions at color borders, ensuring the contrasting hues work harmoniously to produce vibrant, textured layers. For best results, consider proper storage of your layered paint to preserve the vibrancy and integrity of the finish over time.
Seamless Blending Techniques
Seamless blending techniques elevate layered furniture finishes by creating smooth, cohesive color shifts that highlight texture and depth. You achieve this by layering semi-transparent coats of different hues, then blending them with dry brushing or stippling to erase harsh lines. Incorporate textured layers such as sponging or stippling with a chip brush to add visual interest and facilitate smooth color transitions. Make sure each layer dries thoroughly before adding the next to prevent muddiness and guarantee clean, cohesive color integration. Sand lightly between layers to reveal underlying hues, boosting the layered effect and creating a natural, blended appearance. Additionally, practicing dynamic communication exercises can help you better understand how to assess and respond to different visual and tactile cues during the refinishing process, ensuring a more successful and satisfying outcome. Developing an understanding of color theory can further enhance your ability to select harmonious hues and achieve balanced, vibrant finishes, especially when working with various fabric decorating markers to add unique accents. Incorporating layering techniques can also improve the depth and richness of your final piece, making it more visually appealing. Exploring Glycolic Acid benefits may also inspire you to incorporate subtle textural contrasts in your finishing techniques, resulting in a more dynamic and refined look.
Creating a Rustic, Weathered Look With Distressing Methods
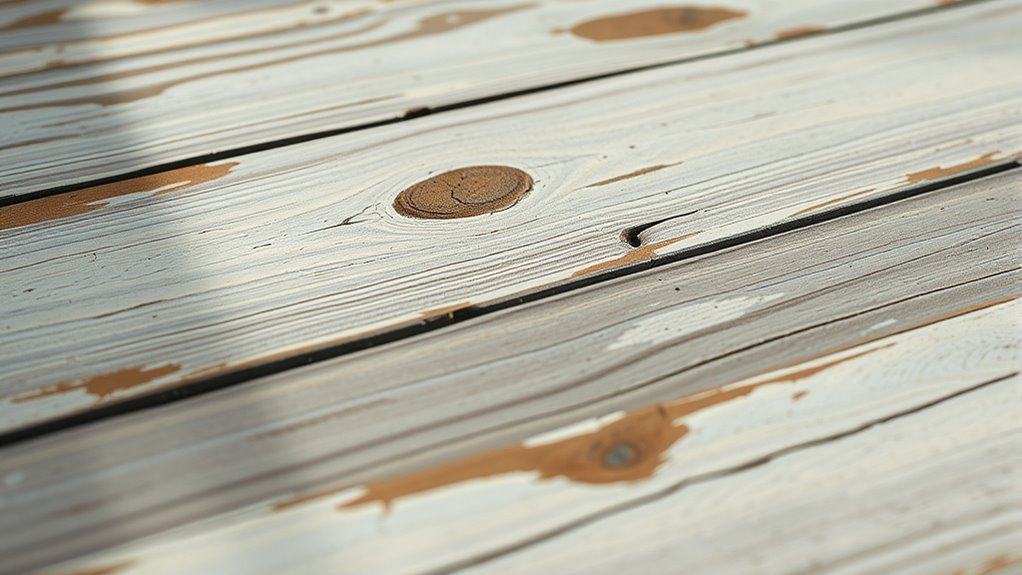
To achieve a rustic, weathered look, start by layering paint or stain and allowing each coat to dry completely. Use sanding techniques selectively on edges and worn spots to reveal underlying layers and create natural distressing. Controlled sanding and strategic application of distressing methods will give your furniture an authentic, aged appearance. Incorporating knowledge of the refrigeration cycle can inspire creative finishes that mimic aged, weathered surfaces by replicating the effects of natural wear and temperature fluctuations.
Layered Sanding Techniques
Layered sanding techniques are essential for achieving a rustic, weathered look on wood furniture. Start by using a 5-inch orbital sander with 220 grit or higher sandpaper to smooth the surface and remove the factory finish. For a distressed finish, apply multiple thin coats of paint or stain, letting each dry completely before lightly sanding between coats. This process builds layers that add depth and texture. After the final coat, selectively sand high-traffic areas, edges, and corners with a fine-grit sanding block or sander to reveal underlying layers, enhancing the weathered look. Combining dry brushing and sanding helps blend layers seamlessly, emphasizing the rustic charm. These layered sanding techniques are key to creating a truly authentic weathered, distressed finish. Incorporating automation’s role in business intelligence can further streamline the process by providing real-time insights into optimal sanding times and techniques, ensuring consistent results. Additionally, understanding sound vibrations and their influence can be utilized to influence the curing process of finishes, potentially improving adhesion and durability. Recognizing how regional divorce statistics reflect broader societal trends can also inspire creative approaches to distressed furniture, such as incorporating vintage or reclaimed wood styles popular in specific areas. Furthermore, experimenting with different finishing products can yield unique textures and effects, elevating the overall aesthetic of the piece, especially when considering the impact of market trends in furniture design.
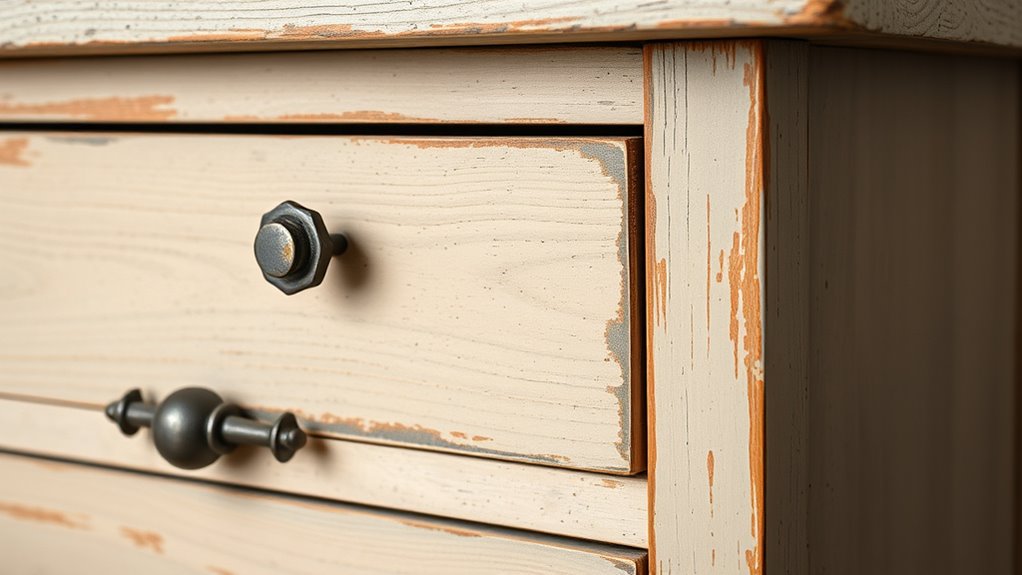
Controlled Distress Application
After applying multiple layers of paint or stain and allowing them to dry thoroughly, you can begin creating a weathered, rustic look through controlled distressing. Use fine-grit sandpaper or a 3×4 electric sander to selectively distress the finish, revealing underlying layers and adding character. Focus on sanding edges, corners, and areas prone to natural wear to craft authentic, weathered imperfections. Incorporate controlled sanding over stencil designs or painted details to soften sharp lines and enhance the aged appearance. Lightly sand high spots and areas with excess paint to mimic natural aging and wear. Always make certain the paint, stencils, or wax layers are fully dry before distressing to prevent muddiness or accidental removal of the desired finish. Properly curing paint ensures the durability of your distressed finish and prevents damage during the distressing process. Additionally, understanding the importance of attention in creative practice can help you achieve more nuanced and refined results in your furniture refinishing projects. Developing a clear organization system for your tools and materials can also streamline your workflow and improve the quality of your work. Implementing environmentally conscious sustainable techniques can further enhance your project’s overall quality and ecological impact.
Incorporating Faux Rust and Metal Details for Added Character
Adding faux rust and metal details instantly gives your furniture a weathered, vintage look that feels authentic. To achieve this, layer red and orange paint on metal parts using a chip brush to mimic rust. Lightly sand the surface afterward to enhance the distressed, aged appearance. Use a water mister to create drippy, runny rust effects by wetting painted areas and letting the paint flow naturally. Build up realism by applying multiple layers of colors—reds, oranges, and browns—and then sand certain spots to reveal underlying textures. For extra authenticity, blend and layer these shades to imitate natural corrosion. Finish by dabbing with a fine brush or tongue depressor dipped in water to emphasize drippy, faux metal details, adding character and depth to your piece.
Using Stencils and Wax to Add Depth and Unique Accents
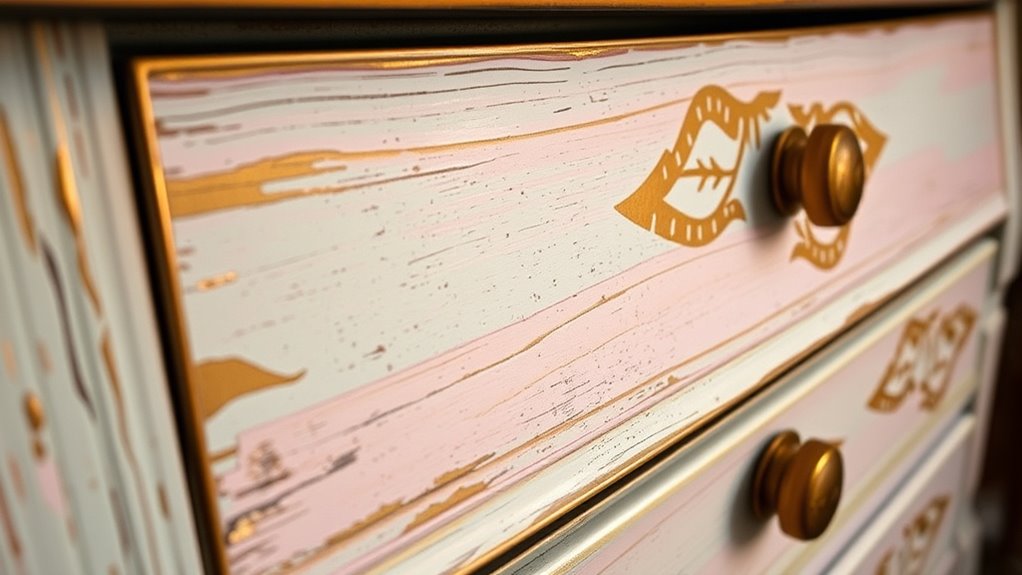
Using stencils and wax is a straightforward way to add depth and unique accents to your furniture. Start by using a premium chip brush to push paint through the stencil mesh, ensuring crisp, clean patterns with minimal bleeding. Reuse your stencils 10-12 times by washing them thoroughly after each project, making this an affordable way to add detailed touches. Let the stencil paint dry completely before lightly sanding; this preserves sharpness and prevents muddiness. To enhance the distressed look, apply colored wax—like Dixie Belle’s Florida Orange mixed with clear wax—into cracks and crevices with a chip brush for added dimension. Finish with a light sanding to reveal underlying layers, emphasizing texture and character. Using wax types such as colored or clear wax can further enhance the aged appearance and add a protective finish to your project.
Applying Stain and Glaze to Enhance Grain and Warm Tones
Applying stain and glaze can greatly enhance the natural beauty of your furniture by emphasizing grain and adding warm tones. Use a water-based gel stain, like Voodoo Gel Stain in Tobacco Road, and apply it over painted surfaces by spritzing with water. This helps the stain absorb better and highlights the wood grain. Use long, grain-following strokes for even coverage, ensuring the natural texture stands out. Let the stain sit for a few minutes, then wipe off any excess with a clean cloth to deepen the color and bring out the grain. For added dimension, combine the stain with a contrasting glaze to accentuate details and create a layered, authentic look. This technique instantly transforms your piece into a warm, inviting focal point.
Sealing and Protecting Your Piece for Long-Lasting Beauty
To guarantee your furniture remains beautiful and durable over time, sealing it properly is vital. Applying a high-quality sealer like Gator Hide provides essential protection, especially over layered paint and distressed textures. Use multiple thin coats of sealing product to build a strong, protective barrier that preserves vibrant colors and intricate details of your boho chic finish. Be sure to wait 24-48 hours after applying wax or stain, allowing all layers to fully cure for best adhesion. Light sanding between coats enhances durability and ensures a smooth, even surface. Proper sealing prevents dust, dirt, and moisture from damaging your piece, prolonging its lifespan while maintaining its authentic rustic charm. With the right protection, your furniture will stay stunning and resilient for years to come.
Documenting Your Process and Showcasing the Final Transformation
Capturing your furniture’s transformation through photos and videos is essential to showcase the beauty and craftsmanship of your refinishing project. Documenting each step—from prep to final finish—allows you to highlight the artistic choices and techniques involved. Take detailed close-up shots of textures, layered colors, and distressing details to emphasize craftsmanship and the unique character of your piece. Sharing before-and-after images vividly illustrates the dramatic transformation and inspires others. Guarantee consistent lighting and angles to accurately represent the colors, textures, and distressed features. Adding captions or descriptions explaining your techniques enhances storytelling and educates viewers about your process. This documentation not only preserves your work but also celebrates the effort and skill poured into turning a dull piece into a boho chic masterpiece.
Embracing Your Unique Style: Tips for Personalizing Your Boho Chic Piece
Ever wonder how to truly make your boho chic furniture reflect your personality? To personalize your piece, play with bold colors, layered textures, and eclectic accents that showcase your style. Use stencils, waxes, or staining techniques to add custom details and depth, making your furniture uniquely yours. Embrace imperfections like distressing and layering, which add character and authenticity to your piece. Incorporate metallic or rust effects on hardware or decorative elements to enhance the rustic, bohemian vibe. Trust your instincts and experiment with different color combinations and textures until you develop a signature look that speaks to your personality. Remember, embracing imperfections and customizing textures will turn your furniture into a true reflection of your individual style.
Frequently Asked Questions
How to Get a Distressed Look on Wood Furniture?
To get a distressed look on wood furniture, you start by sanding edges and corners to create a naturally worn appearance. Apply multiple paint or stain layers, then sand selectively to reveal underlying colors. Use uneven brush strokes or dry brushing for texture. Once dry, lightly sand high spots and add a clear wax or sealant. This process results in a charming, rustic finish that enhances your furniture’s character.
How Do You Make Furniture Look Like Weathered Wood?
Oh, you thought weathered wood was just a lucky accident? Think again. To make furniture look weathered, you layer muted colors like sea spray or barn red, then sand lightly to reveal the layers beneath. Use a dry brush to add texture, incorporate metallic touches for rust, and distress by scraping or sanding. Finish with a matte sealer, and voilà—your furniture will look authentically aged and beautifully worn.
How Do You Make Old Wood Furniture Look New?
To make old wood furniture look new, start by sanding off the old finish with a 5-inch orbital sander to create a smooth base. Clean the surface with a deglosser like Dixie Belle White Lightning to improve adhesion. Apply layered, textured colors with stippling and dry brushing to add depth. Finally, distress the edges for a vintage touch and seal with a protective coating like Gator Hide to preserve the look.
How Do You Paint Antique Furniture Without Sanding?
You might think you need to sand, but you don’t! To paint antique furniture without sanding, start by using a deglosser like Dixie Belle White Lightning to remove the glossy finish. Clean thoroughly to guarantee paint sticks well. Apply a bonding primer for better adhesion, especially on slick surfaces. Then, use quality chalk or furniture paint in thin coats, and lightly sand only if necessary to smooth high-gloss areas.
Conclusion
Transforming your furniture from dull to boho chic is both an art and a journey. You’ll embrace imperfections and weathered charm, turning everyday pieces into statement treasures. While the process requires patience and creativity, it’s in these raw, rustic details that true character shines. So, don’t rush—enjoy the imperfections. After all, it’s the beauty of imperfection that makes your piece uniquely yours, blending old-world charm with modern boho flair.