
To craft your own boho lanterns and lampshades, start by gathering unique shades and materials like rattan, wicker, or fabric from thrift stores or online sources. Prepare your frames with waterproof coatings and secure your weaving or knotting patterns for outdoor durability. Add decorative elements and finish with waterproof sealants for weather resistance. With some creativity and patience, you can create stunning, personalized pieces that shine beautifully outdoors—if you keep exploring, you’ll uncover even more tips to perfect your project.
Key Takeaways
- Gather vintage or thrifted shades and natural textures like rattan or wicker for unique boho-inspired lanterns.
- Waterproof and seal frames with outdoor-rated spray and sealants to ensure durability in outdoor settings.
- Use creative weaving, knotting, and symmetrical patterns with waterproof materials for structural stability and aesthetic appeal.
- Add decorative embellishments like beads or tassels to personalize your boho lighting fixtures.
- Regularly maintain and reapply waterproof sealants to ensure long-lasting, weatherproof outdoor lanterns and lampshades.

LYOOWNG Plug in Pendant Light Cord, Farmhouse Hanging Lights with Plug in Cord, 15FT Hemp Rope Plugin Hanging Light Cord Kit with On/Off Switch, E26 E27 Light SocketCord, Bulb NOT Included
- Plug-in Pendant Light Kit: Farmhouse hanging light with E26/E27 socket
- UL Listed Socket and Plug: Safe rated with adjustable 15FT hemp rope
- Compatible with Various Bulbs: Supports incandescent and LED bulbs up to 60W
As an affiliate, we earn on qualifying purchases.
As an affiliate, we earn on qualifying purchases.
Gathering Materials and Inspiration
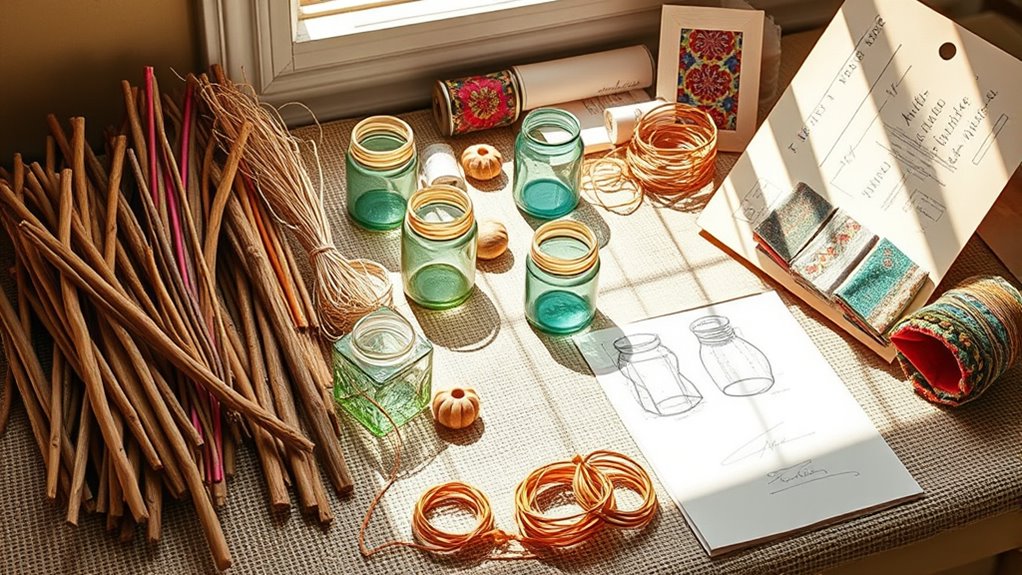
Before you begin your lighting DIY projects, it’s essential to gather the right materials and inspiration. Your goal is to create a focal point that transforms your space with statement lighting. Start by exploring thrift stores and vintage shops for unique lamp shades you can repurpose—these are perfect for going to break the mold of traditional lighting. Draw inspiration from nature, like rattan or wicker textures, to add an organic, boho vibe. Collect various materials such as waterproof adhesives, craft wire, and decorative elements to customize your lanterns and lampshades. Use online tutorials and DIY blogs to explore weaving patterns and structural ideas. Incorporate lighting design principles to enhance the visual appeal of your lighting fixtures and create a cohesive look. Understanding sound vibrations can help you select materials that resonate well and produce harmonious lighting effects. Additionally, researching safety considerations ensures that your handmade fixtures are both beautiful and secure for everyday use. With the right supplies and inspiration, you’re ready to craft eye-catching lighting that truly stands out.
Selecting the Perfect Lamp Shades for Repurposing

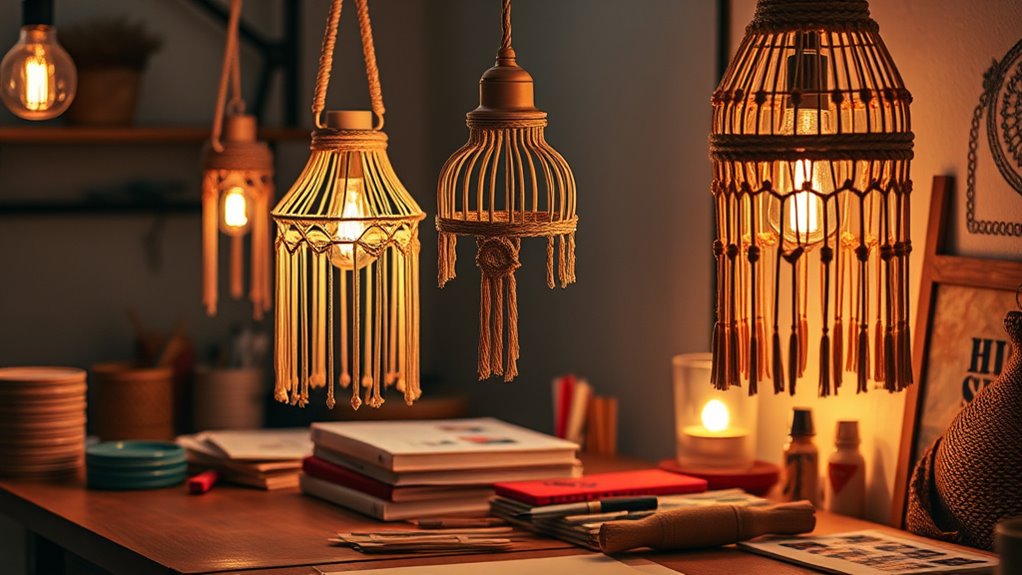
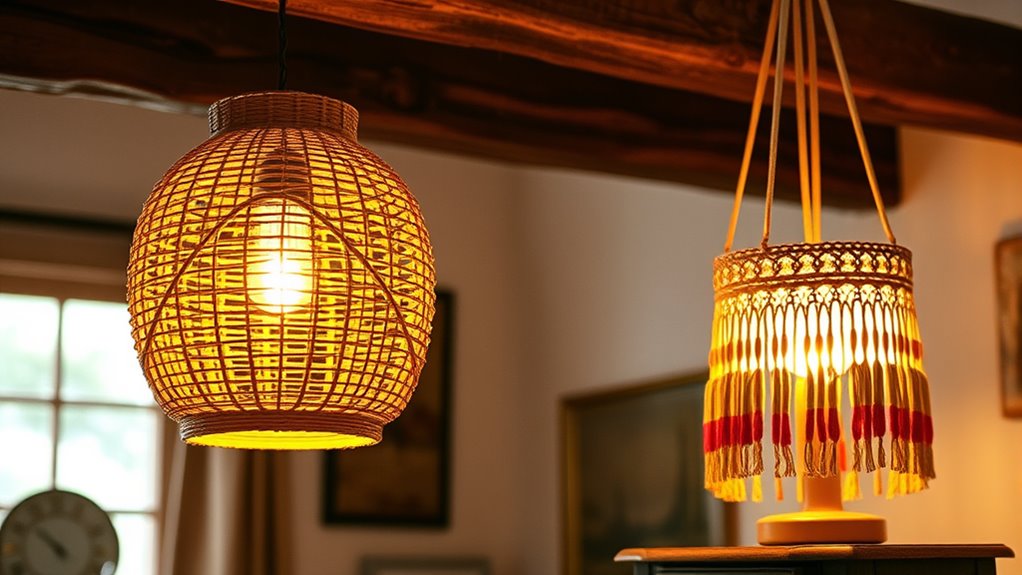
Choosing the right lamp shade is key to creating a successful DIY lighting project. Look for shapes like drum or bell styles—easy to modify for weaving or embellishment. Materials matter; plastic or fabric shades are lightweight and simple to work with, perfect for outdoor or boho lanterns. Thrift stores and flea markets are treasure troves for vintage shades you can transform into unique designs, including rattan pendant lights. Avoid delicate or intricate shades that may break or be difficult to adapt. Opt for sturdy frames with minimal internal wiring for safe disassembly and easy customization. Additionally, understanding lamp shade materials can inspire creative upcycling projects. When selecting shades, consider heat resistance to ensure safety when using certain light bulbs or candles. Proper shade sizing is also important to ensure the shade complements your fixture and provides the desired light diffusion. Here’s a quick guide:
| Shape | Material | Best for |
|---|---|---|
| Drum | Fabric, plastic | Versatile, easy to modify |
| Bell | Fabric, plastic | Elegant, simple to weave |
| Cylindrical | Rattan, fabric | Perfect for boho lanterns |
Choosing wisely to craft stunning repurposed lighting! Understanding AI integration can help you explore innovative design ideas and smarter lighting solutions.
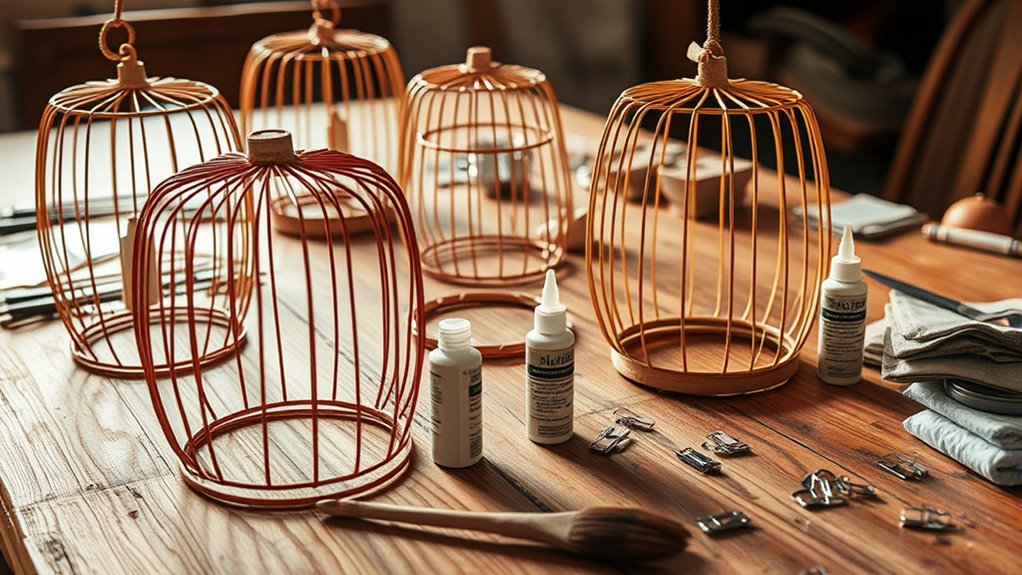
Preparing and Waterproofing Your Frames
Before waterproofing your frames, choose the right materials like waterproof spray or sealant to protect against moisture. Make sure to remove any old glue, fabric, or debris so the coating adheres properly. Once applied, let everything dry completely before exposing your frames to outdoor weather. Additionally, selecting appropriate outdoor gear can help ensure durability and longevity of your DIY lanterns. Incorporating best beaches for inspiration can also guide your design choices and help you achieve a coastal or tropical aesthetic that complements your outdoor space. Using waterproofing techniques suitable for self-watering plant pots can further enhance the durability of your lanterns against damp conditions. Embracing industry transformations like AI automation and innovative materials can improve the efficiency and quality of your DIY projects. Implementing smart toilet features, such as sensors and automatic flushing, can also improve the functionality and hygiene of your outdoor lanterns, especially in humid environments.
Selecting Waterproof Materials
Ever wondered how to guarantee your DIY lanterns withstand rain and humidity? The key is choosing waterproof materials like plastics or synthetic fibers, such as PVC or polyethylene, which resist moisture effectively. When building your frames, apply sealants like clear outdoor spray or waterproof glue to prevent water from seeping in. Using plastic-dyed grass skirts or synthetic coverings boosts durability and is more resistant to rain than natural fibers. Make sure any adhesive you use is rated for outdoor conditions, capable of handling humidity and temperature swings. Additionally, sealing all joints and seams with weatherproof sealants helps protect your lanterns from water damage, ensuring they stay vibrant and functional over time. Proper material selection, sealing, and choosing rain-resistant fabrics are essential for long-lasting, weatherproof outdoor lighting. Incorporating waterproofing techniques further enhances the durability of your DIY projects. Considering outdoor conditions such as humidity, rainfall, and temperature fluctuations can help you select the most suitable materials and methods for your specific environment. Understanding the Law of Attraction principles can also inspire creative and positive energy into your craft, making the process more enjoyable and fulfilling.
Sealing the Frame Edges
Sealing the frame edges is a crucial step to keep water out and protect your DIY lanterns from rain damage. Apply a waterproof sealant, like silicone-based or latex, around all open edges and joints for maximum protection and flexibility. Make sure to cover every seam thoroughly to prevent water from seeping inside. For added durability, wrap the edges with waterproof tape or rubber edging before sealing. Allow the sealant to fully cure according to the manufacturer’s instructions before exposing your lantern to moisture or outdoor elements. Regularly inspect the sealed edges and reapply the sealant as needed to maintain waterproof integrity. Proper sealing not only extends the life of your lantern but also ensures it remains safe and functional in outdoor conditions. Additionally, fire safety precautions should be considered when designing and using outdoor lighting to prevent fire hazards. Being aware of weatherproofing techniques can further enhance the durability of your outdoor DIY projects. Understanding the importance of Kia Tuning principles can also help you create more resilient and long-lasting outdoor lighting fixtures by choosing high-quality materials and techniques. Incorporating proper sealing methods can significantly improve the overall weather resistance of your lanterns, ensuring they withstand various environmental challenges. Employing regular maintenance practices can help identify potential issues early and prolong the lifespan of your outdoor lighting.
Applying Protective Coatings
To effectively protect your lamp frame from moisture and outdoor elements, you need to apply a reliable waterproof coating. First, ensure your frame is thoroughly cleaned and free of dust, glue, or debris to promote proper adhesion. Use waterproof sealants like polyurethane or outdoor-rated acrylic spray to shield the woven structure from rain and humidity. Apply the coating in thin, even layers, letting each dry completely before adding the next—this prevents buildup and uneven coverage. If your lamp will face direct sunlight or high temperatures, consider using heat-resistant, outdoor-safe varnishes for added durability. Regularly inspect your protective coating and reapply as needed to maintain waterproofing and extend your DIY lantern’s lifespan. Proper coating ensures your project stays beautiful and functional outdoors. Additionally, understanding Halloween traditions can help you choose themed colors and designs that complement your lighting decor. Being aware of relationships dynamics can also help you create a cozy and inviting outdoor space that fosters positive interactions. Moreover, choosing the right weatherproofing materials can further enhance your lantern’s resistance to the elements, ensuring long-lasting enjoyment.
Wrapping and Securing Your Rattan or Substitute Material
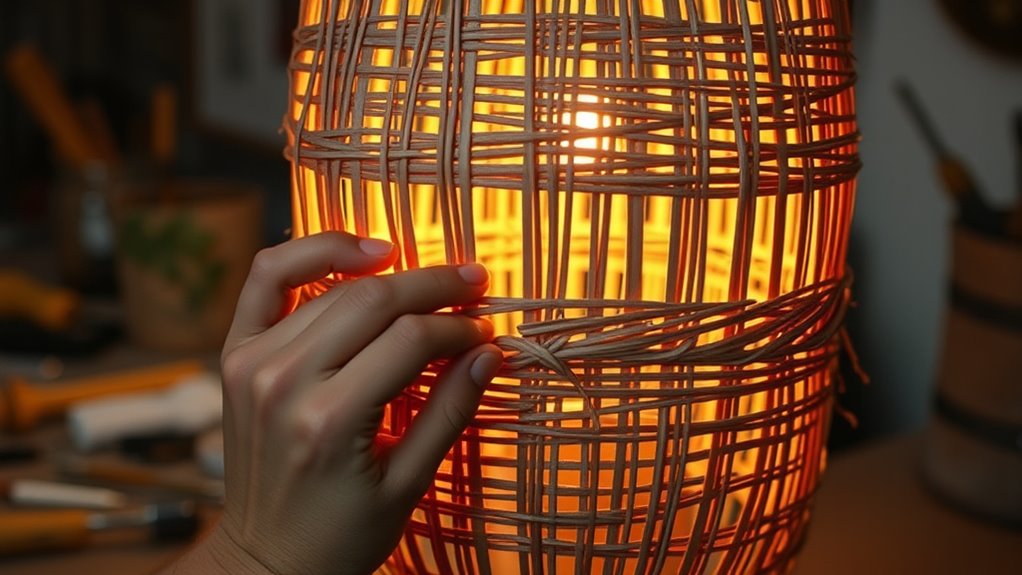
Start by securing the rattan or substitute material firmly to the lamp frame with a strong adhesive like Gorilla wood glue, which can withstand heat up to 200°F. Once glued, wrap the material tightly around the frame, making sure there are no gaps. Use additional glue or binder clips to hold loose ends until they dry completely. For extra stability, tie the material at key junctions or intersections with small knots or fasteners to prevent shifting or unraveling. If you’re using plastic grass skirts or similar substitutes, double-wrap or layer the material for increased durability and waterproofing. Throughout the process, work in a position that allows you to maintain even tension and alignment, ensuring a neat, professional finish. This approach guarantees your lanterns or lampshades are both sturdy and visually appealing.
Developing Creative Weaving and Knotting Techniques
Exploring innovative knot patterns and weaving styles can transform your lighting projects from simple to striking. Using different materials, like cords or metallic threads, adds texture and visual interest. Focus on achieving symmetry and proper tension to guarantee your fixtures are both beautiful and durable.
Innovative Knot Patterns
Innovative knot patterns reveal new possibilities in creating visually striking and structurally sound lighting fixtures. By experimenting with simple knots like overhand or square knots, you can craft secure, decorative weaves. Incorporating vertical and horizontal knotting techniques allows you to design intricate lattice patterns that boost both style and stability. Adjustable knots offer the flexibility to fine-tune tension and spacing, ensuring your lampshades are durable and tailored to your space. Additionally, combining different knot styles, such as slip knots or half hitch knots, introduces texture and unique geometric designs. Mastering these foundational skills empowers you to experiment with complex weaves, giving your lighting projects a personalized, innovative touch. These techniques open endless creative potential for your DIY lighting endeavors.
Using Different Materials
Have you considered how using different materials can elevate your DIY lighting projects? Experimenting with options like rattan, plastic grass skirts, and fabric strips introduces unique textures and visual effects to your lanterns and lampshades. These materials can be woven using various techniques, from simple overhand knots to intricate macramé patterns, allowing you to customize strength, flexibility, and appearance. Using flat, non-twisted strands helps create even spacing and a polished look. Combining weaving styles like basket weave, cage, or spiral adds structural stability and decorative complexity. Remember to select heat-resistant adhesives and materials to ensure your design holds up against outdoor elements or heat sources, maintaining durability and safety in your finished piece.
Achieving Symmetry and Tension
Achieving symmetry and proper tension in your weaving is essential for a polished and durable lighting project. To do this effectively:
- Keep your strands evenly pulled, securing them with knots at regular intervals to prevent sagging or gaps.
- Measure and mark equal distances on each side of the frame before weaving to maintain consistent symmetry.
- Use flat, non-twisted strands to ensure uniform spacing and pattern consistency.
Adjust tension as you go by tightening or loosening the weave, ensuring a snug fit around the frame. Incorporating secure knotting techniques, like doubling back strands or tying upside-down knots, further enhances both tension and visual symmetry. With careful attention to these details, your lantern or lampshade will be both beautiful and sturdy.
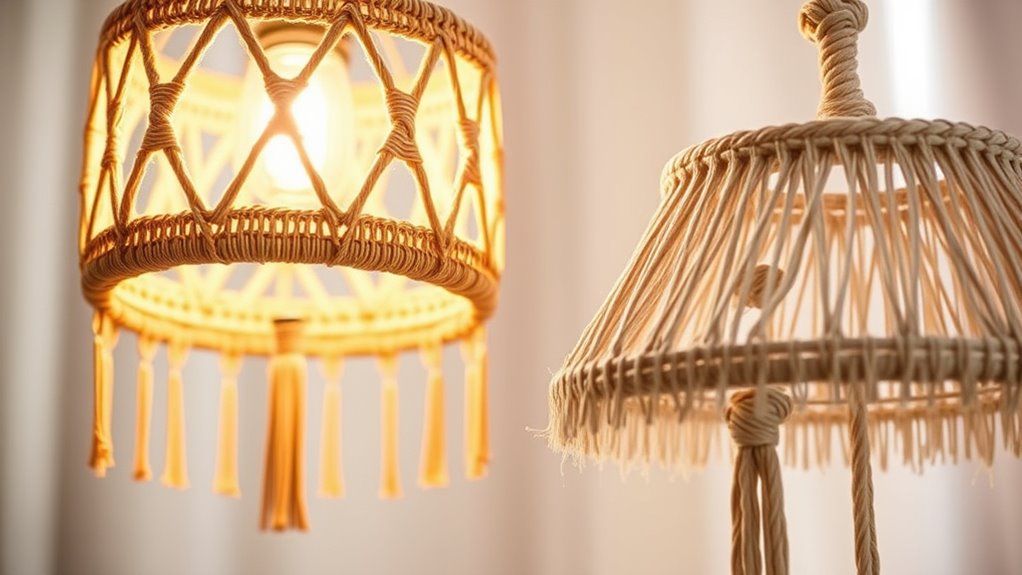
Experimenting With Design Variations and Patterns

Ever wondered how small changes in weaving patterns can transform the look of your DIY lanterns? Experimenting with different styles, like basket weave or minimal cage designs, can drastically alter their aesthetic. Using flat, non-twisted strands guarantees uniform spacing and consistent patterns, giving your lanterns a polished look. Adjusting the tightness of your weaving or knot placement lets you customize the shape, texture, and visual impact. Incorporating symmetrical patterns or asymmetrical accents adds a personal touch, making each piece unique. Before finalizing your design, test different materials and techniques on small prototypes; this helps you refine your pattern and assures durability. By exploring these variations, you can craft lanterns that reflect your style and elevate your space effortlessly.
Adding Final Touches for a Polished Look
To give your DIY lanterns a professional and polished appearance, focus on refining details like symmetry, spacing, and finishing touches. Properly adjusting these elements ensures your lanterns look cohesive and well-crafted. To enhance the overall look, consider these steps:
Refine details like symmetry and spacing for a polished, professional-looking DIY lantern.
- Check and tighten the weave to improve texture and symmetry.
- Use consistent spacing and align patterns for a unified design.
- Add decorative touches such as tassels, beads, or paint to personalize your lantern.
Additionally, trim excess glue or unraveled strands for a clean edge. Applying a protective sealant or waterproof coating can boost durability, especially if you plan to display your lanterns outdoors. These final touches will elevate your project from handmade to professional-looking.
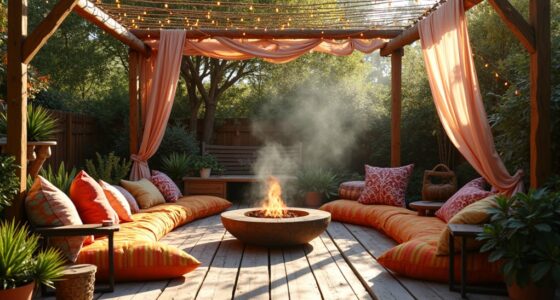
Tips for Outdoor Use and Durability

When preparing your DIY lanterns for outdoor use, selecting the right materials is key to ensuring they withstand the elements. Go for weather-resistant options like waterproof glue and UV-protected rattan to handle sun and rain. Seal all woven seams and edges with a clear waterproof sealant to prevent water from seeping in and causing damage over time. Use outdoor-rated light fixtures and bulbs, such as LED string lights or waterproof pendants, to guarantee safety and longevity. Elevate your lanterns on sturdy, weatherproof hooks or stands to avoid contact with standing water or dirt. Regularly inspect and clean your lanterns to remove dirt and debris, and reapply protective coatings as needed. These steps help your creations stay beautiful and durable through the seasons.
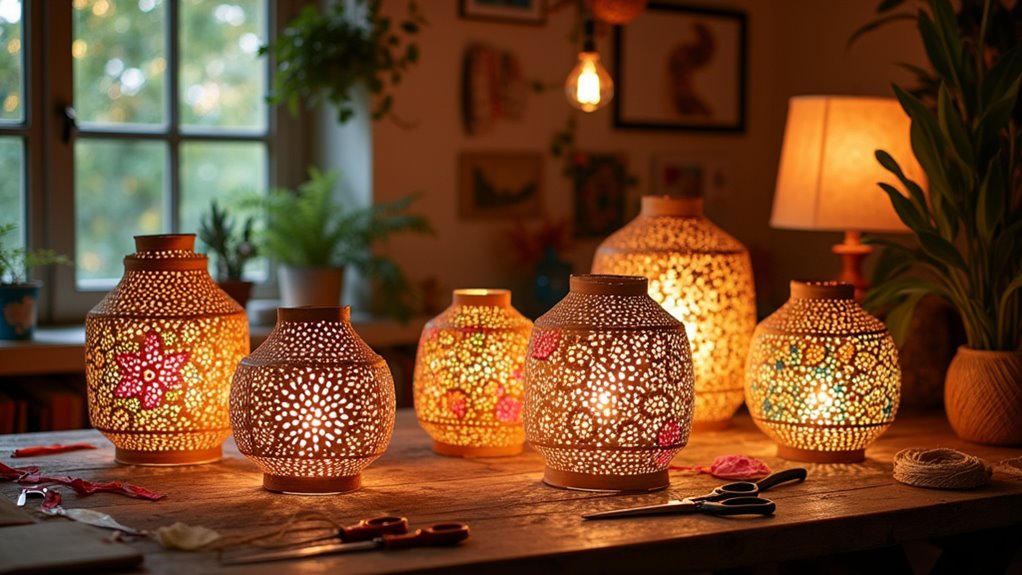
Showcasing Your Custom Boho Lanterns and Lampshades
Showcasing your custom boho lanterns and lampshades is all about highlighting their unique design features, like intricate woven patterns and vibrant color schemes. To make your creations stand out, photograph them in well-lit outdoor settings that emphasize craftsmanship and aesthetic appeal. Consider the following steps:
- Capture detailed shots that highlight woven textures and vibrant hues.
- Share process videos or step-by-step tutorials to inspire others.
- Use before-and-after images to show the transformation from plain or thrifted shades to stunning decor pieces.
Adding engaging descriptions of materials and your design inspirations helps viewers appreciate the creativity behind each piece. This approach not only showcases your craftsmanship but also encourages others to explore their own DIY lighting projects.
Frequently Asked Questions
How Do I Choose the Right Lighting Equipment for My DIY Lanterns?
When choosing the right lighting equipment for your DIY lanterns, consider the type of bulb that suits your design and desired ambiance. Think about brightness, color temperature, and energy efficiency. Make certain the bulb fits securely and is compatible with your lantern’s socket. You should also assess safety features like heat resistance and ensure the equipment matches your lantern’s size and style for a cohesive look.
What Safety Precautions Should I Consider During the Crafting Process?
You’ve got to be a safety superhero when crafting your DIY lanterns! Always wear protective gloves and goggles—these are your armor against sparks and splinters. Work in a well-ventilated space to dodge fumes, keep a fire extinguisher nearby for emergencies, and double-check electrical wiring for safety. Don’t rush—think like a safety ninja—so your creative adventure stays fun, safe, and flawless!
Can I Use Artificial or LED Lights Instead of Traditional Bulbs?
Yes, you can definitely use artificial or LED lights instead of traditional bulbs in your DIY projects. They’re energy-efficient, produce less heat, and are safer for crafting. Just make sure the lights you choose are compatible with your lanterns or shades, and verify the wattage limits to avoid overheating. Always follow safety guidelines, and ensure your wiring is secure to prevent any electrical issues.
How Do I Maintain and Clean My Handmade Lampshades?
Imagine your lampshade as a delicate garden that needs gentle tending. To keep it shining, dust it regularly with a soft brush or cloth, like tender leaves brushing against each other. For stubborn spots, lightly dampen a cloth with mild soap and water. Avoid harsh chemicals or soaking, as they can damage your creation. With care, your handmade lampshade will stay luminous and beautiful, like a well-kept sanctuary.
Are There Eco-Friendly or Sustainable Materials Suitable for This Project?
You can choose eco-friendly materials like bamboo, jute, or recycled paper for your project. These sustainable options are not only better for the environment but also add a unique, natural look to your boho lanterns and lampshades. Look for biodegradable or recycled fabrics and avoid plastics whenever possible. Using natural dyes can further enhance your project’s eco-friendliness. This way, you craft beautifully while reducing your ecological footprint.
Conclusion
Now that you’ve crafted your own boho lanterns and lampshades, you’ve created something truly unique. Did you know that DIY lighting projects can reduce costs by up to 60% compared to store-bought options? With your newfound skills, you can keep experimenting and customizing designs to match any space. Keep your creativity shining bright, and enjoy the warm, cozy glow of your handcrafted creations—your home’s new favorite statement pieces!